Download windows vista for bootable flash drive. Create a bootable flash drive in Windows from the command line
In this article you will learn how to make a bootable (multi-boot) flash drive for installing Windows XP/Vista/7. We will look at the simplest and effective method creation bootable flash drive Windows. We’ll also look at the process of installing Windows from a flash drive.
You can also watch a video tutorial from which you will learn how to make a bootable Windows USB flash drive.
Stage No. 1. Preparing USB flash for Windows entries.
1.
Let's launch.
2.
The flash card must be formatted using the Bootice utility. You just need to click on Bootice and wait for the utility to load.
3.
After launching the utility, select your flash card from the list (of course, the flash drive must be connected).
4.
Press the button Parts Manage.
5.
Then press the button ReFormat USB disk.
6.
Next, select USB-HDD mode(Single Partition) and click Next Step.
7.
Next step: choose file system NTFS, in which the flash card will be formatted (in this case, all files on the flash drive will be erased!).
8.
Then we agree with all messages and wait for formatting to complete.
9.
We return to the Bootice window, but now click the button Process MBR.
10.
If you want to install Windows XP, then choose Windows NT 5.x MBR. If you want to install Windows Vista or Windows 7, you must select Windows NT 6.x MBR.
11.
Then click on the button Install/Config and agree with the message.
12.
Finally, we return back to the main WinSetupFromUSB window.
Stage No. 2. Making a bootable Windows USB flash drive.
Now let's look at how to burn Windows onto a USB flash drive.
1.
Select your flash card from the list USB Disk Selection.
2.
Then select the folder with your Windows installation files. There are two options here:
2-1.
If you are installing Windows XP: you need to check the box next to Windows 2000/XP/2003 Setup and by clicking on the button on the right, specify the path to installation files(to the location where the I386 folder is located). The disk image needs to be unzipped into a folder or mounted to virtual drive.
2-2.
If you are installing Windows Vista or Windows 7: you must check the box next to Vista/7/Server 2008 - Setup/PE/RecoveryISO and by clicking on the button on the right, specify the path to the installation files.
3.
Press the big button GO. The processing of your installation documents will begin. Windows files and then recording them onto a USB flash drive. 
Stage No. 3. Windows installation from a flash drive.
1.
You need to insert the bootable USB flash drive into the USB connector of your computer.
2.
Turn on the computer (if it was turned on before, you need to restart the system).
3.
During POST (Power On Self Test), press the F12 button (or F10, depending on the BIOS version).
4.
A list of boot devices will appear in which you need to select your flash card.
5.
When a list of operating systems to install appears, click Enter.
6a. To start text mode Windows installation (changing disk partitions and then formatting them, copying installation files to disk), select First part of setup Enter.
6b. After the first stage of installation and reboot, you need to boot from flash again and now select Second part of setup(the text should be highlighted in yellow) and press Enter.
Screenshots


This installation method is suitable if you own a netbook or your CD/DVD drive has failed and you need to install Windows 7. This method is also good because the process of installing Windows 7 from a flash card is several times faster than from a CD or DVD disk.
Before you start recording Windows 7 to a flash drive, copy all important data from the flash drive to other storage media ( HDD where Windows will not be installed, another flash card, disk, etc.), since during the process of formatting and writing the Windows 7 image to a flash drive, all data on it will be destroyed.
First way
If you are creating a bootable USB flash drive while in the Windows 7 operating system, then you will need a program Windows 7 USB/DVD Download Tool, which can be downloaded from Of. Microsoft website following the link.
If you create a bootable USB flash drive under the operating system Windows system XP, you will need to install Microsoft.NET Framework 2.0 And Microsoft Image Mastering API 2.0. Of course, if you already have them installed (usually the first program), then you do not need to install them again.
1) Insert the USB flash drive into the laptop.
2) Launch the program. Click the button Browse.
3) Select ISO image Windows 7 and click Open.

4) After you have specified the Windows 7 ISO image, click the button Next.

5) Click the button USB device.

6) Your flash drive should appear in this window. Click the button Begin copying

7) Click on the button Erase USB Device

8) Click Yes.
9) The process of writing the Windows 7 image to the USB flash drive will begin

10) When recording is complete, the status will change to Backup completed. Close the program

Second way
For the second method you will need a program Ultra ISO.
1) Insert the USB flash drive into the laptop.
2) Launch the program. In Windows 7 and Windows Vista, it is recommended to run the program as an administrator.
The UltraISO program is paid, but you can use a trial period, we will consider this option. Click the "Trial period..." button

3) Select a menu item File ->Open...

4) Select the Windows 7 ISO image and click the button Open.


6) In the field Recording method: select USB-HDD. Click the button Format.

7) The formatting utility will launch. Click the button Begin.

8) Click OK.

9) After formatting, a success window will appear. Click OK.

10) Close the program.

11) Press the button Write down.

12) Click Yes.

13) The process of writing the Windows 7 image to the USB flash drive will begin.

14) Upon completion of recording in the column Event The message “Recording complete!” will appear. Close the program.

Third way
For the third method, we need the WinSetupFromUSB 1.0 Beta 7 - program.
Note: the link has a newer version, but the principle remains the same.
1) Insert the USB flash drive into the laptop.
2) Launch the program. In Windows 7 and Windows Vista, the program must be run as an administrator.

In field USB disk selection and format your flash drive should be listed.
Note: If the flash drive is not detected, then format it using the PeToUSB or HPUSBFW utility.
Also, the flash drive may not be detected if it is inserted into the laptop after the Winsetupfromusb 1.0 Beta7 program has been launched and for it to be detected, just press the button Refresh.
3) Click the button RMPrepUSB.

4) Mark the following lines: WinPEv2/WinPEv3/Vista/Win7 bootable (CC4), NTFS. Place a check mark next to it Boot as HDD (C: 2PTNS). Click the button 6 Prepare Drive.

5) Click the button OK.

6) Click the button OK.

7) After this, something like this will appear Dos window.
Warning: Do not close this window. It should close automatically.

8) After Dos the window will close click the button Exit.

9) Check the box next to it Vista/7/Server 2008 - Setup/PE/RecoveryISO. Click on the square on the right.

10) A window will appear Browse folders in which you need to select the virtual drive in which the Windows 7 ISO image is mounted.
After you have done this, press the button OK.

11) Press the button GO. The process of writing Windows 7 to the USB flash drive will begin.

12) At the end of recording, a small window will appear. Click OK.

13) Close the program.

Fourth method
The installation method is quite simple, so anyone can do it! For this we need:
1) Windows image 7
2) Flash drive with a capacity of at least 4GB
3) A program for creating and editing ISO images, ultraISO from the above method or free MagicDisk
You can take any media from a regular flash drive to an SD card, but not less than 4GB!
4) Launch the command line (in Windows XP this is standard->command line. In Windows Vista/Windows 7, open start, at the very bottom there is a search, enter cmd and open with administrator rights).
5) Next on the command line enter diskpart, the disk management utility will open.

6) Next, in the diskpart utility itself, enter: list disk, this will display all the physical disks of the PC, namely disks and not partitions.
Among them we are looking for our flash drive.

7) Then we execute the command select disk #, Where # This is the number of our flash drive.
In this case, the flash drive on the screen is number 1, therefore s elect disk 1. All further manipulations will be carried out only with this disk.
8) Execute the command clean, clean the drive, then the command create partition primary- create a new partition on the disk.
9) After creating a new section, write select partition 1, select this section for manipulation, enter active, thereby making the section active.
10) Now for the flash drive to be visible in bios, you need to format it in NTFS format, which is what we do as a team format fs=NTFS.
11) Next, you need to activate the process of connecting the device and assigning letters to it, we do this with the command assign.
That's it, the preparation process is complete.

Installing Windows 7
You can record the distribution using any file manager or a free one.
In this case, you need to somehow open the image of the installation disk with the OS, this can be done with any disk emulator, Alcohol or MagicDisk, create an image and copy everything from it with a file manager to our prepared flash drive.
That's it, the process of creating the installation flash drive is completed, now we try to install the OS by first setting it in bios.
Well, that’s all, which of the four methods of creating a bootable flash drive to use is up to you.
Inclusion in BIOS boot from a flash drive
Before you start installing Windows 7 from a flash drive, you need to go into the BIOS and enable booting from the flash drive.
To enter the BIOS you need to press a certain key when the computer boots. On desktop computers This is the Del key. On laptops, the F2 key is most often used.
Usually, when you turn on the laptop, a screen appears on which at the very bottom there is a line that says which key you need to press in order to enter the BIOS.
If you do not have such a line, then you need to look at the information on how to enter the BIOS User Manual walking with a laptop.
1) Insert the flash drive into the laptop if it is not inserted.
2) Turn on the laptop, if it is on, then reboot.
3) Go to BIOS.
Using an example, the whole process will look as shown below; if your BIOS is different, then the principle will remain the same. If you have questions, write in the comments.

4) Go to the tab Boot. In it, in boot order, you need to put our flash drive in first place, using the arrow keys and keys F5 And F6. That is, we use the arrow keys to select our flash drive, and use the key F6 we take her to the very top.
To find out which keys you need to use to set the boot order, see the tips on the right.
The name of the flash drive should appear in the line USB HDD.
Also, the flash drive may appear in the line USB KEY.
To save changes and exit the BIOS, press the key F10. (Depending on the BIOS manufacturer, the key may be different. See tips on the right or below).

5) A window will appear asking in English whether to Save changes and Exit? You are taking Yes.

6) After this, a reboot will occur and the Windows 7 installation process will begin.
Installing Windows 7 from a USB flash drive
If a bootable USB flash drive with Windows 7 was created using the WinSetupFromUSB 1.0 Beta 7 program, a green screen will first appear. Select Start Vista/Win7/Server 2008 Setup or PE/Recovery ISO from partition 0.

Next, the Windows 7 setup program will launch.
Write in the comments what is not clear and what questions you have.
It is very convenient to have a bootable USB flash drive. It takes up little space and is more difficult to break than a disk. No, seriously, it is very easy to damage a CD/DVD disc. Just a few random scratches in certain places and the disc can be thrown away. Plus, a flash drive will always help you out in a situation when there is simply no DVD drive, but the computer needs to be repaired urgently.
Note: In case of damaged CD/DVD, do not rush to throw away the disc. Perhaps scratches will not affect its serviceability. If the drive still refuses to read such a disk and gives you errors, you can try old way. Only use it in extreme situations. Wet the disc under warm water and wipe with a soft cloth that does not leave small particles. If you don’t have a source of water at hand, you can simply breathe on the disc and wipe it with a cloth. And it's not a joke. Seasoned users will confirm this method, which has proven itself well in the era of 2/4 and 8-speed drives. By the way, despite the fact that the 2-speed drives were very slow, they read even heavily damaged disks (when they almost walked over the surface with sandpaper).
There are many different ways to create a bootable USB flash drive, including various free third-party tools. But, within the framework of this article, the greatest interest is system utility diskpart. And there are several reasons for this. First, you can create a boot disk without any additional tools, which is very important in critical situations. Secondly, Microsoft has a pretty good track record when it comes to creating and using bootable disks (mostly due to common problems old Windows versions, but still). Therefore, you can count on such an important factor as stability.
The "DiskPart" utility itself is designed to perform various disk operations, including creating bootable flash drives.
Note: diskpart command also exists in Windows XP, but it cannot be used to create a bootable USB flash drive.
Create a bootable flash drive in Windows from the command line
Programs for creating bootable USB flash drives in Windows

If you prefer to use GUI in return command line, then you can download and install one of the many free programs, of which there are plenty on the Internet. One such program is EasyBCD, which includes, in addition to creating bootable disks, a number of useful functions. However, even though the program has a graphical interface, you still need to be careful when using it, as in inexperienced hands it can also erase all information from the disk.

If you're interested in a simple standalone utility that won't require installation, then you'll love Bootable USB Drive Creator Tool. The utility creates boot disks running MS-DOS or FreeDOS. So in the future you need to take this fact into account.
Installing the OS if you have a disk drive is quite simple. However, when you need to do this USB help– drive, many users have problems. In fact, this procedure is very simple, and anyone can handle it.
What do we need
In order to install Windows Vista you will need a distribution kit. It can be downloaded from the official website or from third party resources. Commercial sales have been discontinued.
Although Vista is a relatively outdated OS, some users are interested in its minimum requirements.
They are:
- processor with clock frequency not less than 900 MHz;
- RAM - at least 1 GB;
- free disk space - 15 GB;
- Availability of Internet access (for further registration).
Preparing a bootable flash drive
Surely, inexperienced users may think that it will be enough to just throw the distribution onto disk and that’s it. In fact, in order for the OS installation to start, you will need to perform some manipulations.
UltraISO utility
After downloading the distribution, you need to write it to a flash drive in a certain way. The lightweight and easy-to-use UltraISO utility will help us with this.

Important! Previous versions OS, for example, XP, this program will not be able to write correctly.
To make a simple USB flash drive boot, do the following:
- download the UltraISO application. This can be done on the official website. It is distributed completely free of charge;
- open the program, and be sure to have administrator rights;
- Click on the “file” tab;
- then in the list that appears, select “open”;
- open the image we need on the hard drive;
- click “open”;
- as a result, the image will open, that is, all the files contained in it;
- After opening, you need to write to a flash drive. To do this, select the “Boot” item in the main menu;
- in it we select recording an image from the hard drive;
- A panel will open in which we select the “USB-HDD” recording method. This measure is necessary for the system to correctly identify the device to launch. Only in this case will she be able to correctly interpret the data;
- the line Disk Drive indicates the name of the future flash drive;
Important! If you have several USB devices inserted, check this item.
- Then press the “record” button. An informational message will appear stating that this operation will delete all files from the drive. We confirm;
- We are waiting for the recording to complete.
Video: Installing Windows Vista
Command line
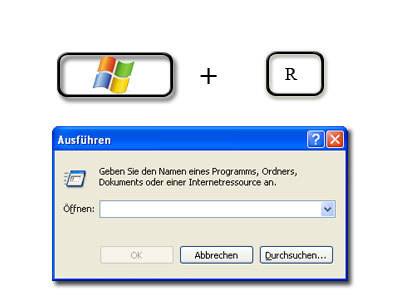
If you don't want to clutter your computer with unnecessary software, you can create a boot drive via the command line. Press “Win+R”. The Run application will open.
- DISKPART- denotes the launch of the command interpreter;
- list disk- display of active drives;
- select disk x (x - disk number)- selecting a specific drive;
- clean- disk formatting;
- create partition primary- creating a section;
- select partition X (x - number)- choice;
- active- section activation;
- format fs=NTFS- erasing all files from the drive
- Exit- completion of the process.

They must be entered in the same order.
Installing Windows Vista from a USB flash drive via BIOS
Having prepared everything you need, you can proceed to the main work front.
Boot priority in BIOS
To start installing Windows Vista from a flash drive to a laptop, you need to set a certain boot order.
To enter this menu, you need to press a system button immediately after starting the computer. Most likely, the name of the key will appear in a message on the screen.

If it does not appear, you can try the following options:
- Enter;
- Backspace.
Once you enter this menu, you need to find the Boot section. You will see a list there various devices, with digital designation. They indicate the loading order.

You need to make sure that USB-HDD comes first (depending on the version motherboard name may vary). To change the order, use the F5 and F6 keys (or “-” and “+”). At the end, be sure to select the “save and exit” option.
Installation process
Reboot the laptop. If everything is done correctly in the previous steps, a system message will appear asking you to press any key.

So, we do the following:

Now all you have to do is wait a while (about half an hour). The system will do everything automatically.
Pre-setting
After unpacking and copying the files, you will need to do some minor system setup.

Drivers for OS
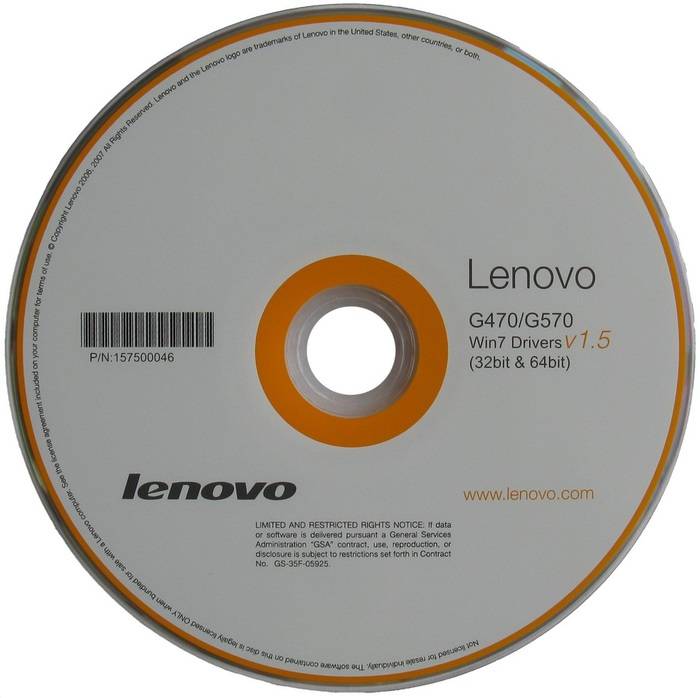
The main work has been completed, but an equally time-consuming task remains - finding drivers. Where can I get them? The ideal option would be to have a special factory disk (this is usually given when purchasing a laptop). But what to do if it is not there? There may be several options:
We use the official website:
- go to the official Internet resource of the manufacturer.
- Then in the search window we enter the laptop identification code. It is written on its bottom and consists of 12-16 digits.
Advice: if you just enter the laptop model, there is a chance that the new software will not work. The fact is that many stores like to modify the “insides” of PCs and laptops.
- click search;
- as a result, a set of necessary drivers should appear;
- download it and install it.
However, this method is not always possible to use. The identification code may be erased, or the manufacturer may be too unknown. In this case, you will have to search for drivers manually.
We do it like this:
- click “my computer” and call context menu;
- in the window that appears, click on “device manager”;
- A list of all equipment will open. Here you need to select each device one by one and write down its identification code;
- To do this, call the context menu on the desired device and select the “properties” item. Next, go to the “details” tab. It will contain the ID;
- copy this set of letters and numbers into a search engine. As a result, it will provide the necessary information.
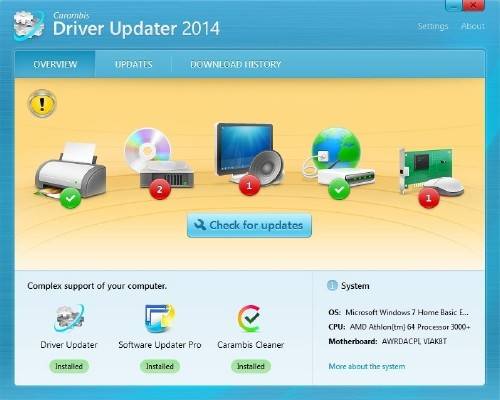
If you don't want to use this method, you can make things a little simpler. In particular, you will need to download some kind of bootloader (for example, X-Driver). This is a utility that diagnoses your computer and downloads and installs the necessary drivers. latest version. The only problem may be finding a working version.
Important! This software actively cooperates with virus toolbar developers. Therefore, during installation, do not forget to uncheck unnecessary boxes.
To use the software described above, you need a fast and stable Internet connection. If it is missing, you can download the driver package. They will be packaged in a single archive. You will need to run autorun and then follow the instructions. Remember that such a package weighs quite a lot (on average from 1 to 10 GB or more).
As you can see, there is nothing complicated about this. If you strictly follow all the instructions, you can easily achieve the desired result. Don't forget to get it right away good antivirus(NOD or AVAST). The fact is that Vista is considered the most vulnerable to malicious files.
>Surely you have some kind of gift flash drives, if you didn’t buy them at the Gorbushkin Dvor shopping complex (the largest store in Russia selling home electronics, household appliances and media carriers). Okay, enough of the demagoguery, let's get down to business.
It happens that you need to load Windows, Ubuntu, and other systems from a flash drive. This is especially true for those who have a netbook and other equipment without a disk drive.
1. Installing the WinSetupFromUSB program on a computer, brief instructions and procedure.
First, let's download the program itself to install the OS for the flash drive. Free program for is possible . After downloading, unzip this program. You can put up to 10 on a flash drive Windows distributions. A flash drive can be 2 GB or more. My flash drive turned out to be 8 GB and it included XP\2000 and the Vista installer. Ability to add to a flash drive , Vista installer, as well as Gparted and SisLinux, already installed QEMU virtual machine and more.
Download, install, run the program. A working window appears:
Into the empty window where Windows 2000/XP/2003 Source indicate the path to the distribution to be prepared. After this we select USB Disk Selection- type of USB storage device. Removable– for flash drives, Fixed- For USB-HDD
Below we see the section BOOT.INI adjustments there we indicate in which folder we install the OS (by default - \ WINDOWS), the name of the disk and partition in which the installation will be performed (by default - the first partition of the first disk)
A little higher in the section we see Format target using which allows you to format a flash drive using utilities HP format tool or PEtoUSB(both programs are included in WinSetupFromUSB)
Here I will tell you in more detail, if in paragraph Test in QEMU check the box, you can check the behavior of the bootloader in virtual machineQEMU(also included in the program). this option very useful, helps to launch without rebooting the computer GRUB4DOS from a flash drive and look at the functionality of the menu.
And at the end of this section - You may also add– allows you to add to a flash drive BartPE/WinBulder/UBCD4Win/WinFLPC, installation Vista setip, Gparted And SisLinux. Using the WinSetupFromUSB program it is possible to install only one version BartPE/WinBulder/UBCD4Win/WinFLPC (does not support RAM version).
2. Formatting the flash drive preferably in the NTFS system
If your flash drive is new and not “kissed”, then first you need to format it, only after that the flash drive can be selected in the window USB Disk Selection. I recommend using HP format tool, because PEtoUSB does not format flash drives NTFS. Remember! When formatting a flash drive, all data is destroyed (if there was information on it), do not forget to make a backup from the flash drive, if necessary. We launch the program and see:


In the window Device select your flash drive, select the file system in NTFS, in the check box we put a tick opposite Quick Format and press the button Start. To format, the program needs only access to the media, so you need to close all programs that block access, otherwise an error will appear:

If there are no errors, then after certain time The formatting process will end with the message:

Click OK and return to the program window.
3 . After selecting the distribution and flash drive, click the button GO:
4 . If there are no distribution kits on the flash drive yet, then this stage will be skipped.
The program scans the flash drive for folders ~BT and ~LS. When they are found, a window appears:

Here you need to answer NO, the program will rename the folders $WIN_NT$.~LS, $WIN_NT$.~BT and file TXTSETUP.SIF, and will also patch the files SETUPLDR.BIN And SETUPDD.SYS according to the new names.
(If you answer YES, the distribution kit and the $WIN_NT$.~LS folder will be synchronized; if you answer CANCEL, the $WIN_NT$.~LS, $WIN_NT$.~BT folders on the flash drive will be deleted and new ones will be created from the distribution kit - it’s useful if this was previously in the process there was an error while working)
5 . In the next window click YES, so that during the installation process the flash drive is assigned the letter U: to avoid problems when installing the OS on the hard drive.

6 . The process of copying files to the flash drive will begin.

The status line shows from left to right: the size of the copied files (562Mb), free space on the flash drive BEFORE copying (2808Mb), the current action, the number of copied files (153), the total number of files to be copied.
7 . At the end of the procedure, a warning window will appear, click OK

This completes the creation of the distribution kit on the flash drive.
8 . After preparing three distributions, the flash drive had the following contents:

As you can see from the picture, each distribution has its own pair of folders and a file TXTSETxx.SIF, winsetup.lst– installation submenu OS V GRUB4DOS, default And windefault serve to remember the parameter default V menu.lst And winsetup.lst respectively, winsetup.lst.bak– file backup winsetup.lst.
You can try the bootloader by checking the box Test in QEMU and pressing the button GO:
Main menu (menu.lst):

I won’t give the full text of menu.lst - there are a lot of commented download options, maybe some will be useful to you, if they are not needed, you can delete them, all that remains is:
color black/cyan yellow/cyan
timeout 30
default/default
title Windows XP/2000/2003 Setup
configfile/winsetup.lst
savedefault
Windows installation menu (winsetup.lst):

color black/cyan yellow/cyan
timeout 30
default/windefault
title First part of Windows XP Home Edition setup from partition 0
root(hd0,0)
savedefault 1
title Second part of XP Home Edition setup+Start it first time from part 0
root(hd0,0)
chainloader(hd0,0)/ntldr
savedefault
root(hd0,0)
savedefault 1
root(hd0,0)
chainloader(hd0,0)/ntldr
savedefault
title First part of Windows XP Professional setup from partition 0
root(hd0,0)
savedefault 1
title Second part of XP Professional setup+Start it first time from part 0
root(hd0,0)
chainloader(hd0,0)/ntldr
savedefault
Already at this stage it is not entirely clear what OS will be installed, so for convenience you can edit the file for yourself winsetup.lst. At the same time, you can remove duplicate lines responsible for the second stage (loading ntldr) and add a return to. This is what the file looks like for me (though after adding another distribution):

color black/cyan yellow/cyan
timeout 30
default/windefault
title Install Windows XP Home Edition SP3 OEM
root(hd0,0)
chainloader (hd0,0)/$WIN_00$.~BT/SETUPLDR.BIN
savedefault 4
title Install Windows XP Professional SP3 OEM
root(hd0,0)
chainloader (hd0,0)/$WIN_01$.~BT/SETUPLDR.BIN
savedefault 4
title Install Windows XP Pro SP3 Zver edition
root(hd0,0)
chainloader (hd0,0)/$WIN_02$.~BT/SETUPLDR.BIN
savedefault 4
title Install Windows XP Pro SP3 xTreme edition
root(hd0,0)
chainloader (hd0,0)/$WIN_NT$.~BT/SETUPLDR.BIN
savedefault 4
title Continue setup + Start it first time from USB (STAGE 2)
root(hd0,0)
chainloader(hd0,0)/ntldr
savedefault
title Return to Main menu
configfile (hd0,0)/menu.lst
The number after savedefault means that the item with this number is installed by default (numbering starts from 0). It is necessary so that after the first stage of installation and reboot, the second stage will automatically start.
If you are confused by the large number of files in the root, then the files winsetup.lst, default And windefault you can move them inside the folder by correcting the links to them.
The default and windefault files have their own format and their contents are not intended for manual modification.