How to distribute wifi from a laptop command line. How to distribute Wi-Fi Internet using the Windows command line
It is known that connecting any gadget: smartphone, laptop, tablet or other device to high-speed Internet via wifi is possible if you have a router.
But there are situations when there is no modem nearby, but the Internet is very necessary. In this case, an excellent solution would be to use a laptop as a wifi modem.
Connection setup
Any laptop can be a point for accessing the Internet; it needs a built-in modem inside.
In this case, you can distribute wifi to other devices, but the network coverage may be small. The power of the built-in modem is not high enough.
For these purposes, you can resort to a special modem amplifier in a laptop.
But there are several methods for distributing Wi-Fi from a laptop: using Windows tools through the installation wizard, and access is also carried out using applications and utilities.
Another method: you can distribute Wi-Fi from a laptop via the command line.
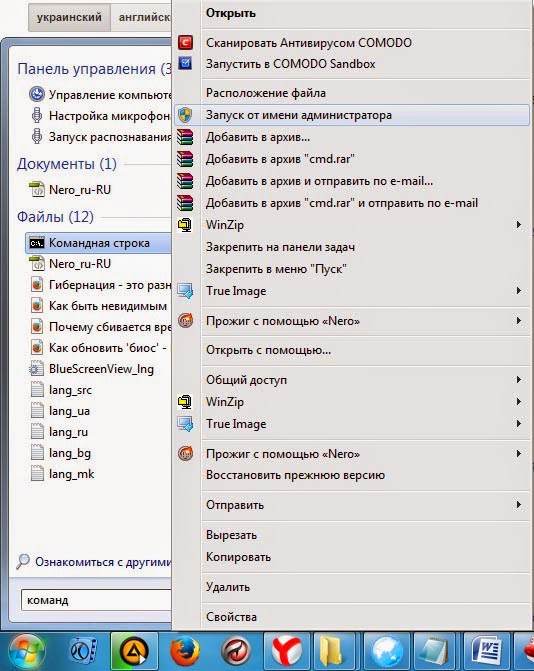
You can connect according to this principle. If you open a window at the bottom of the screen on the Start panel, you will see a line that is used to search for the desired program.
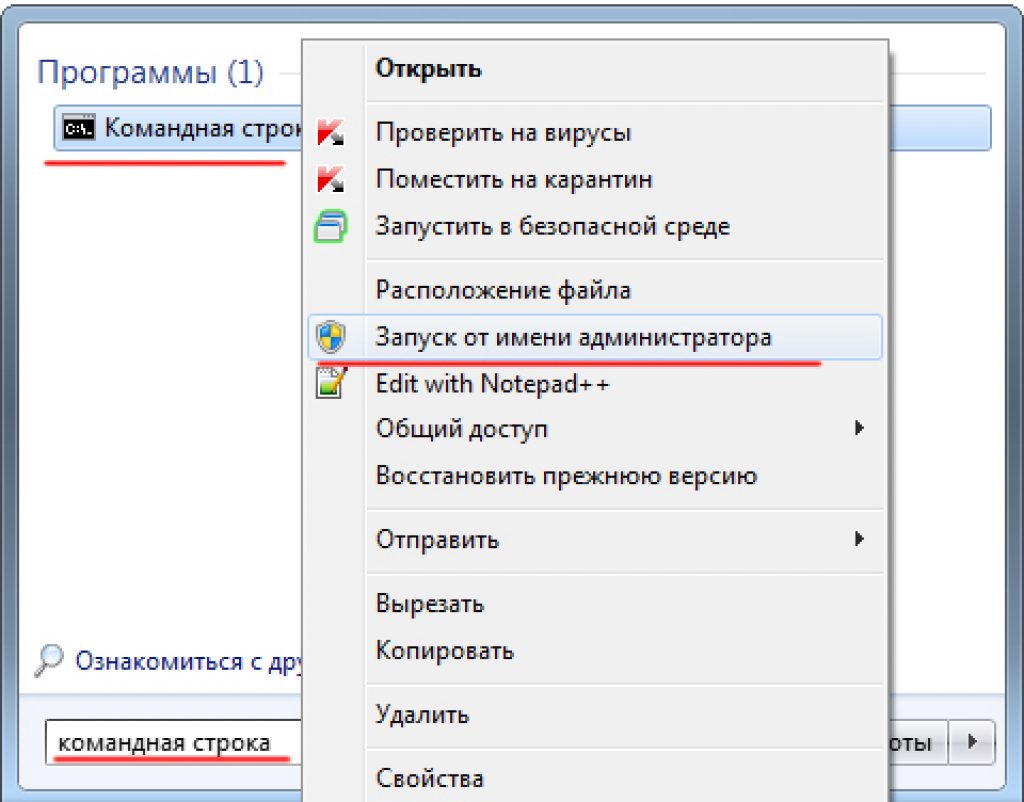
This is the line we need; with its help, Wi-Fi is distributed to devices. If you start typing the word "cmd" or "command. line" A program will pop up at the top of the window. this is who she is. Opens only "as administrator".
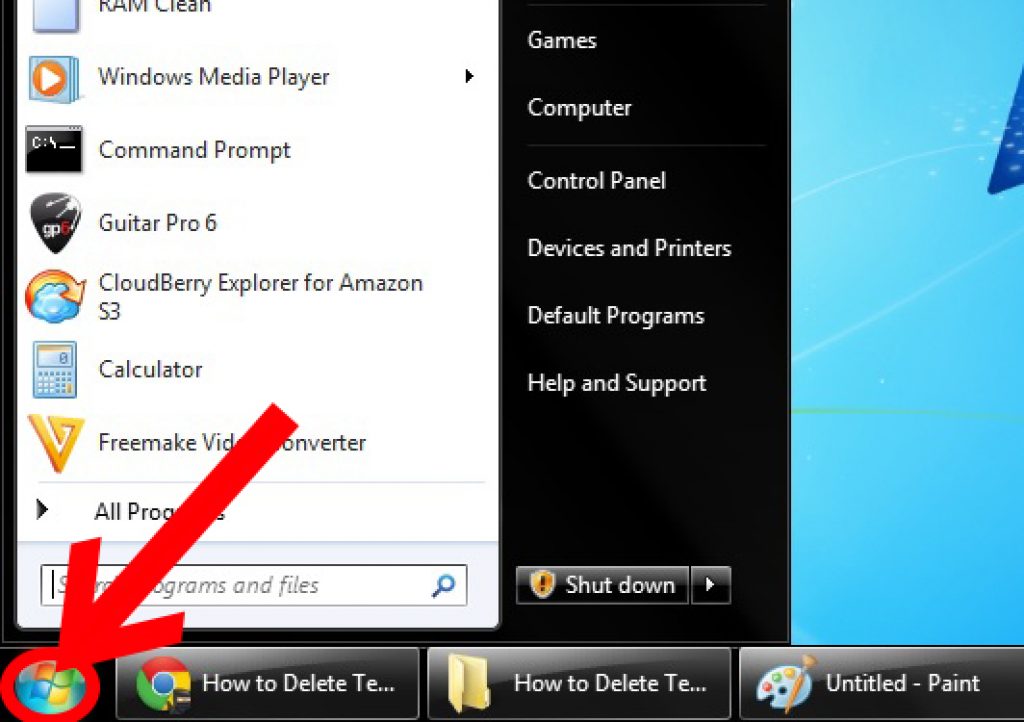
Open at the bottom of the Start screen
Then a black screen will open, and you should write the following characters there:
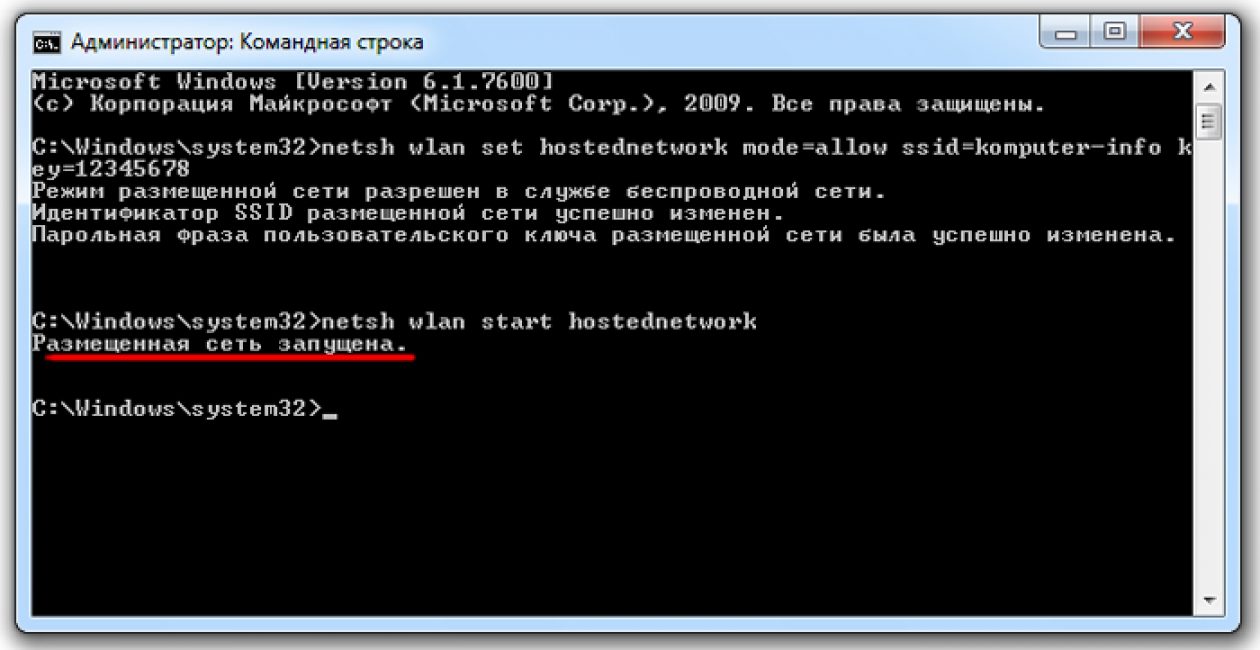
Netsh wlan set hostednetwork mode=allow ssid="Your name" key="your password"
Enter everything without quotes.

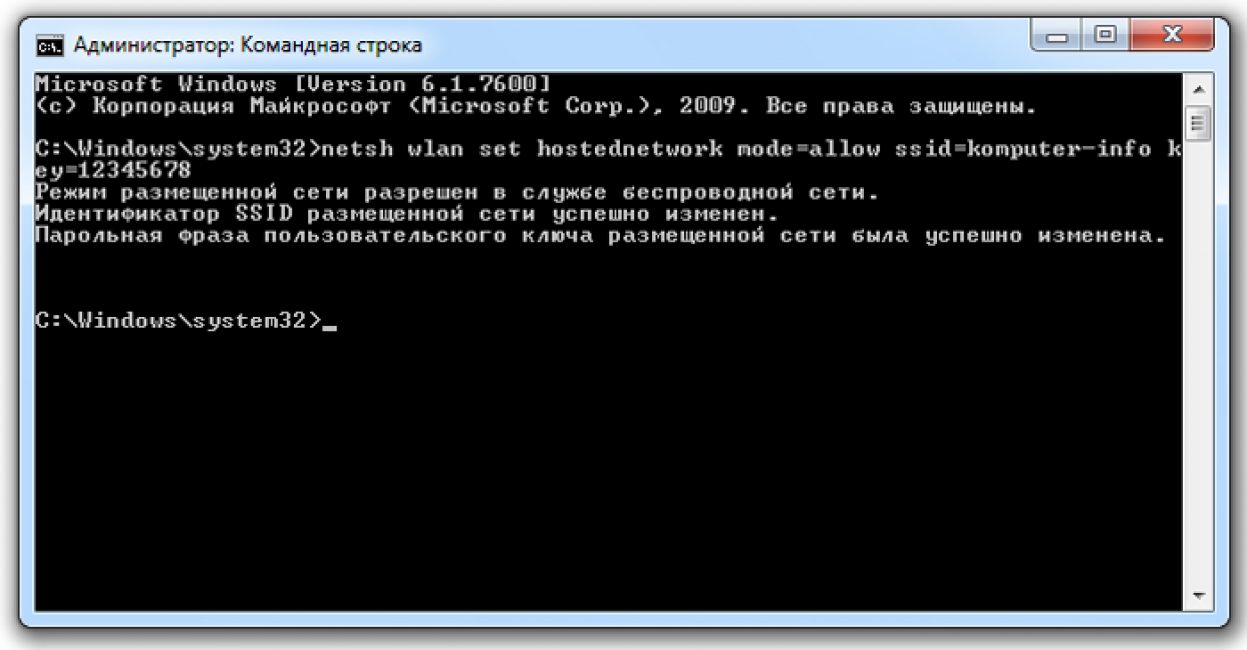
In ssid you name your network, it can be modified. Also, be sure to come up with a strong password. But remember that this is not just a set of numbers.
After all, it is these numbers that contain the network password when connecting to the Internet. When you write it down, remember the password numbers and write it down. Feel free to press “Enter” now.
To start our network, you should enter “netsh wlan start hostednetwork” in the line. A message should appear stating that the newly created new network has been launched.

While the network is being launched, we carry out certain options so that the developed line has access to the Internet network.
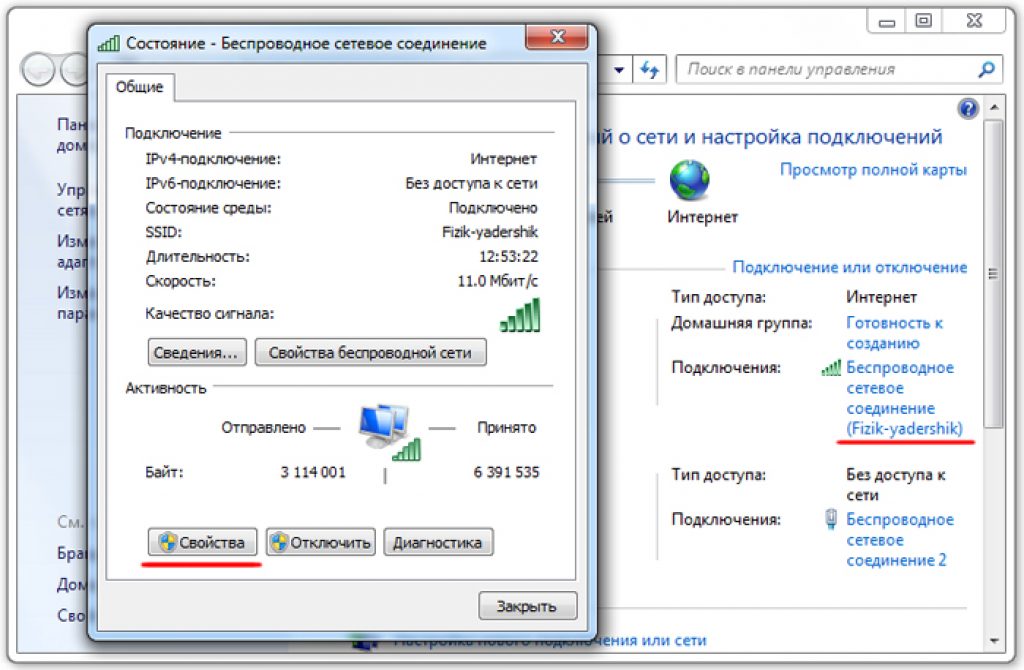
So that all the necessary devices can be used as well. We find here in “Network Sharing Center” Connect button to connect this laptop, turn it on.
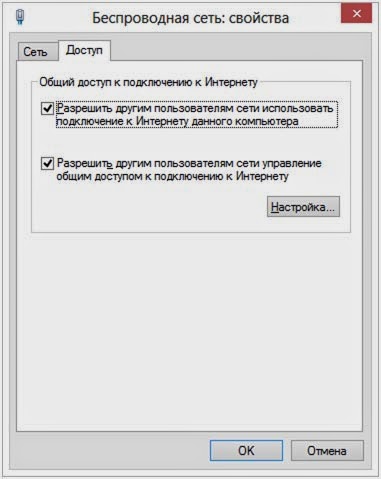
Switch to the “Properties” menu. In the access window, a command is indicated to allow the use of other devices and subsequently use this connection.
Finally, click on the new connection in the list. And the number and name will be indicated there.
As a result of the operations performed, it is possible to connect a variety of devices to the formed network. Smartphones, other laptops, tablets, computers, etc.
To connect, you must use the network password that was set earlier. New network accessible to the Internet, so other gadgets also connect to it.
Below is a list of necessary commands that allow you to manage the new network:
- to start select “netsh wlan start hostednetwork”
- monitoring the operation of “netsh wlan show hostednetwork”
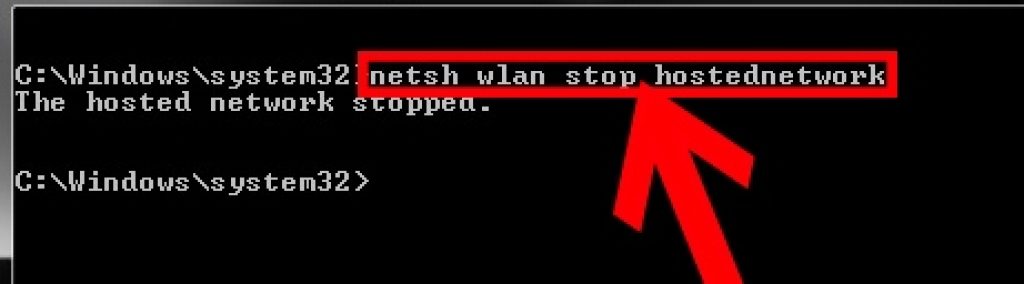
- termination of "netsh wlan stop hostednetwork"
Having stopped the distribution using the command, then we start it again.
Having carried out all these steps, laptop needs a reboot. Try to enter startup commands immediately.
If an error was discovered during the process, then the network was never found. Information will instantly appear notifying you of this.
Let's correct this obstacle by introducing settings:
- "netsh wlan set hostednetwork mode disallow";
- "netsh wlan set hostednetwork mode-allow".
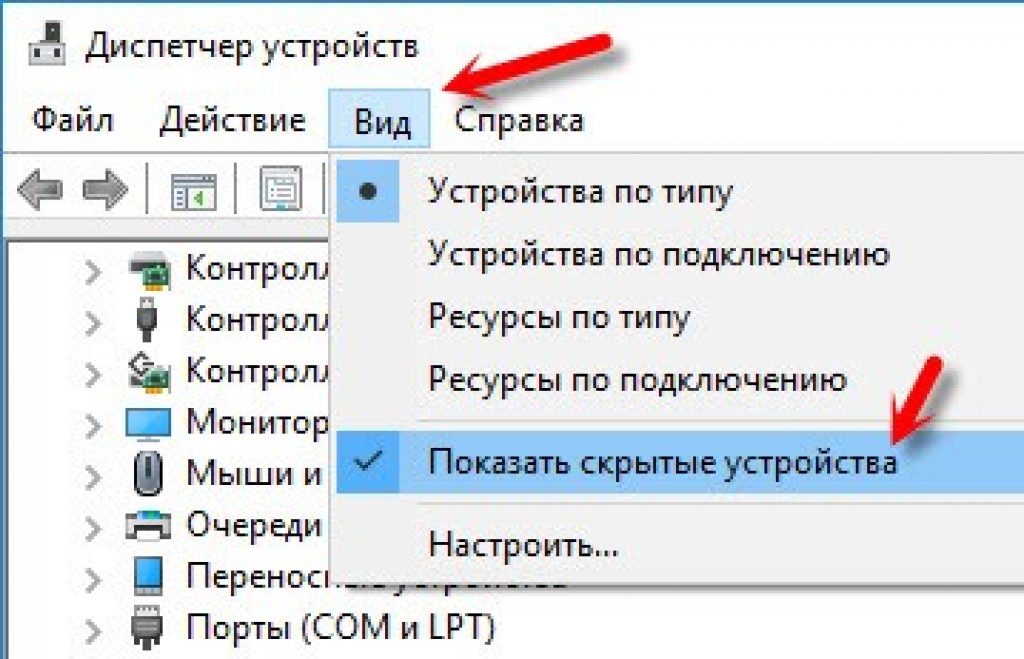
In the manager window there is network adapter, you need to find it and connect it. Team “to engage”. To see them, you need to go to “View” and check the box next to "Show hidden devices".
Automatic network start
After each reboot of the laptop, you will need to turn on the distribution again. Thus, it is possible to stop it using the command as presented above.
But it’s very inconvenient to enter data every time to start the network. You can set it to start automatically wireless network every time the system is turned on.
If you want to make sure that access starts automatically along with the system boot, then there is a guide.
A .bat file is created with the launch of the network, and is simply added to startup. When you turn on the laptop, it will automatically start and execute the command.
After all this, the laptop will begin to provide the Internet without your participation. And to create this, an access point must already be configured. and the Internet is distributed manually.
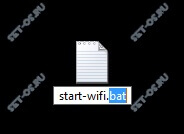
To do this, we create a new one on the desktop Text Document. Name it start_ wifi. bat. The main thing is to use the Latin alphabet and the part.bat., you can choose any name itself.
After renaming it will change after clicking right click mouse and selecting the “edit” command.
Open notepad, paste the command to run there, and save. For automatic installation just add the file to startup.
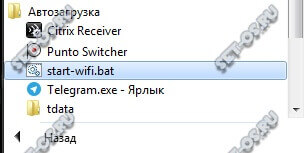
The folder opens as follows: press the “Windows” and “R” keys together, then you will see startup - confirm. When the startup folder is open, copy the .bat file.
We reboot the laptop and we can see the command line flash on the monitor. This indicates that the access point is starting.
After these operations, you will be able to connect to the Internet via a wireless network even in the absence of a router.
Connection errors
Sometimes when trying to establish a wireless line, problems arise. The firewall may simply block access.
Other devices cannot access the Internet, but the network has been found. Disable your antivirus software for a while.
If, after turning it off, the connection to the network is established correctly, then it is necessary to supplement wifi connection to the list of connections in order to avoid blocking.
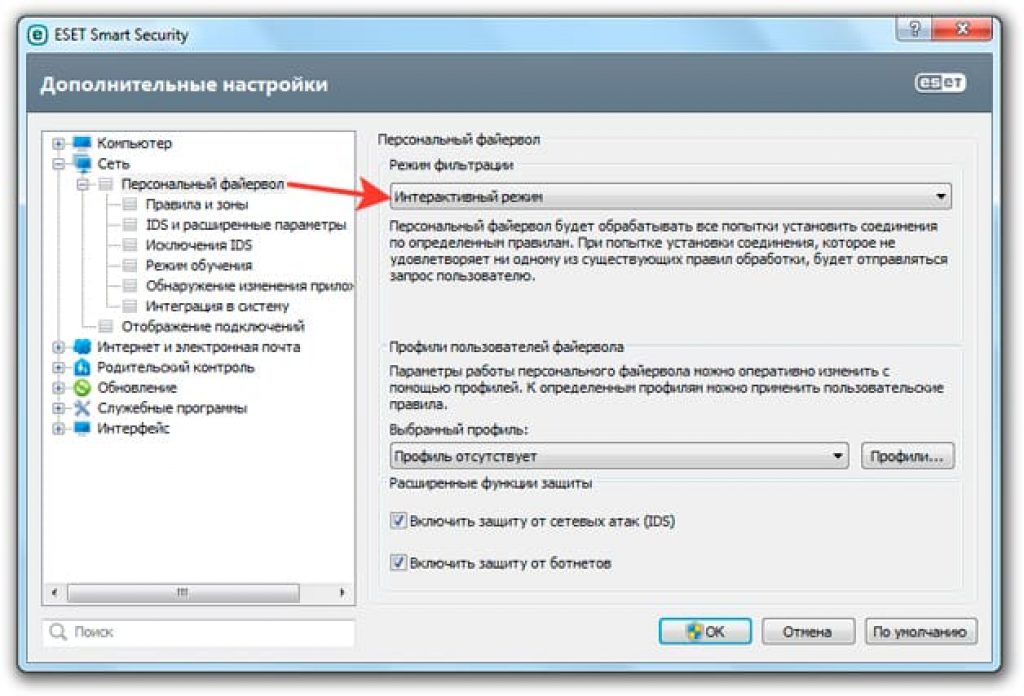
For example, in ESET Smart Security you need to do the following:
1 Open additional settings;

2 Open the “Network” tab and look at the "Custom firewall". To the region "Filtering mode" and there - "Interactive mode".
Many of us are already accustomed to the fact that the router is entirely responsible for the wireless network in our home or office. But sometimes it can happen that you urgently need to open Internet access for your tablet or phone, but you only have one laptop connected to the network at hand. What should I do?
Yes, it’s very simple - distribute WiFi via the command line, using the functionality available for this in Windows 10!
The conditions are as follows: First - yours wireless adapter should support this function (available on almost all modern laptops). Secondly, you will not be able to use Wi-Fi on this laptop yourself.
Setting up WiFi sharing on the command line:
As an example, I will consider the Windows 10 operating system. previous version OS from Microsoft does everything in a similar way.
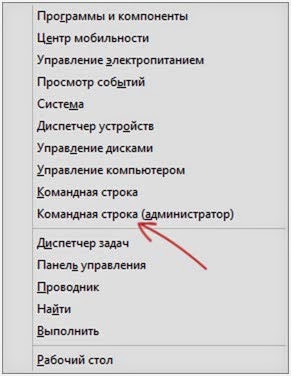
Step 1. Launch the command line with Administrator rights. The easiest way to do this is by right-clicking on the Start button.
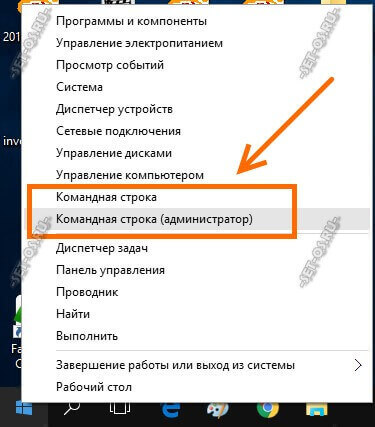
There will be a corresponding item in the menu that opens.
Step 2. Specify the required parameters. In the window command line enter a command like:
netsh wlan set hostednetwork mode=allow ssid=Set-Os key=121223344
Here SSID is the name of the distributed WiFi networks, which customers will see when searching. Key is the password they will have to enter when trying to connect. Visually it looks like this:
It is impossible to create an open network, that is, without a password. This is a mandatory requirement!
Step 3. Let's launch Wi-Fi. In order for the adapter to switch to access point mode and launch the wireless network with the parameters specified above, you need to run the following command:
You will need to enter it every time you go to distribute WiFi from your laptop.
Note: For convenience, you can create a text file on your desktop using Notepad and copy this command into it:
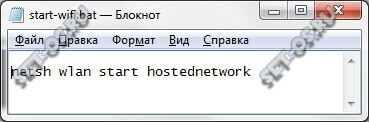
Then we rename the file, changing its extension from *.txt to *.bat
Now, when you launch it, your improvised access point will automatically launch.
If you need to make it start every time you boot your computer or laptop, just place the created BAT file in the Startup folder of the Start menu.
Step 4. We provide clients with Internet access. The previous three steps simply allow you to create a simple wireless local area network, but there is no access from it to the global network. In order for your Wi-Fi to still distribute the Internet, you need to open the list of network connections. To do this, press the key combination Win+R and enter the command ncpa.cpl. A list of connections will appear in front of you. First, let's find a new connection in the list, which represents the WiFi network we created. In my example, it is called “Connection via local network* 4". It may have a different number for you, but the meaning remains the same. We need to share Internet access with it. To do this, we find the connection through which our laptop is connected itself. Usually this is either High speed connection PPPoE or regular LAN - Ethernet (like mine). Right-click on it and select the “Properties” menu item. A window will open in which you need to select the “Access” tab.
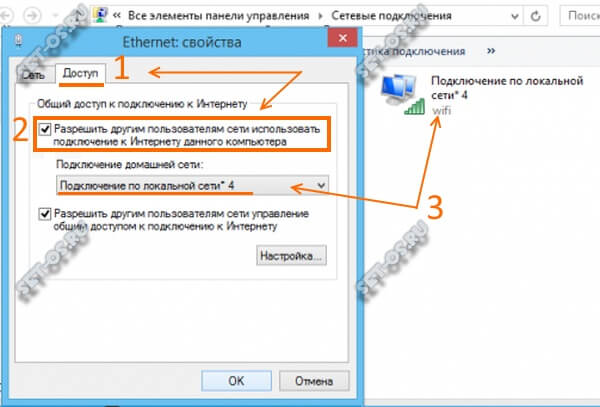
Check the “Allow other network users to use the connection” checkbox. After this, the list of connections will become available home network. Here you need to select our access point created above. Click the “OK” button.
Now you can check your work. Our laptop should provide excellent Internet access via WiFi.
If suddenly at some point you want to disable distribution, just enter the command on the command line:
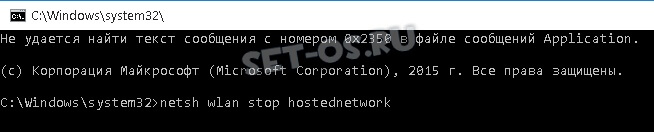
This command will disconnect the access point and all clients connected to it.
Possible problems:
1. When trying to create Windows network 10 writes "The group or resource is not in the correct state to perform the required operation"— make sure that the WiFi adapter of your laptop or computer is turned on and working without problems. Sometimes this message appears if the driver network card does not support the ability to distribute Wi-Fi. Then it makes sense to try updating the driver to the latest one from the manufacturer’s website.
2.If clients constantly see the message “Obtaining an IP address” when trying to connect, then the problem is most likely due to disabled DCHP and Server services. Check that they are enabled and running.
3. Clients connect, but there is no Internet access. Very often this happens when there is a problem with the DNS service on the distributing laptop. Try manually registering the addresses of DNS servers 8.8.8.8 and 8.8.4.4 on clients.
In this article we will look at the method of transmitting WI-FI Internet using standard means operating system windows, namely using the command line (CMD). This method has been tested on Windows 7 and Windows 8.
For a new operating room Windows systems 10 is also suitable (just find the command line, right-click on the Windows logo icon, you will find it there).
Instructions for distributing WI-FI Internet.
1. Click the Start button (WIN+R) and in the " find programs and files" write ncpa.cpl and press " enter".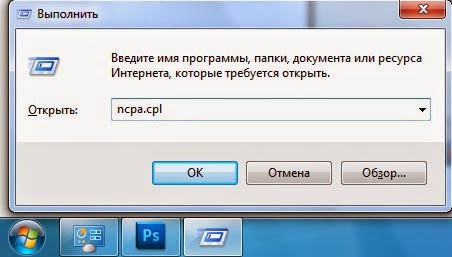
2. You should have a list available connections. Right-click on the wireless network and select " properties".
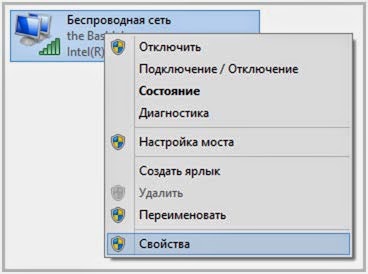
3. In the window that appears open tab " Access" and check the box next to the inscription " Allow other network users to use the Internet connection of this computer " and click the " button OK".
4. At this point, run Command Prompt as an administrator.
Windows 8 - WIN + X and select " command line (administrator)".
Windows 7 - go to start, find the command prompt program and right-click on it and select " run as administrator".
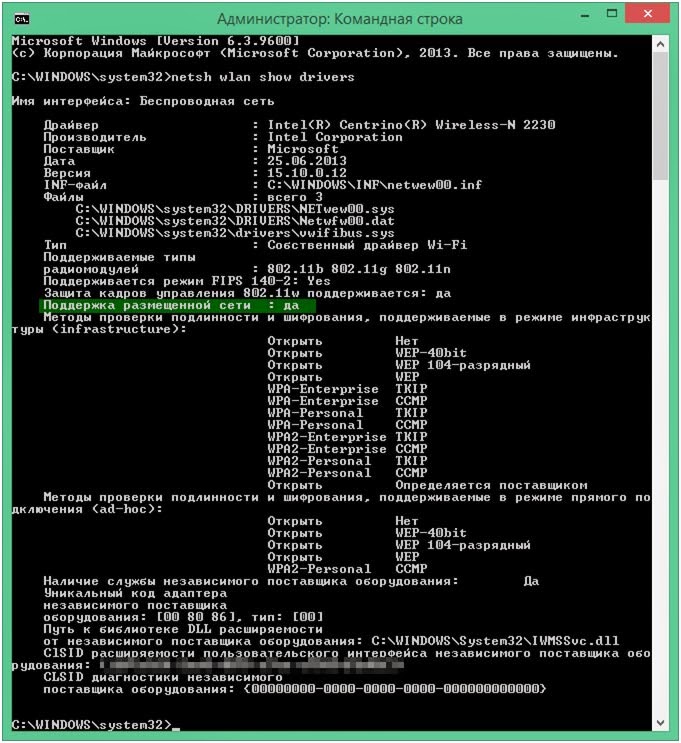
5. On the command line, run the command netsh wlan show drivers. Done, great, now look at the point " hosted network support", if supported, then you can continue to follow these instructions. If not, then try updating the WI-FI driver or installing it from the manufacturer itself.
6. At this stage, we make a router from a laptop. To do this, enter the following command
netsh wlan set hostednetwork mode = allow ssid = "jaswindows" key = "jaswin99"
In this line ssid = "you can enter your name here" key = "your wi-fi password is here."
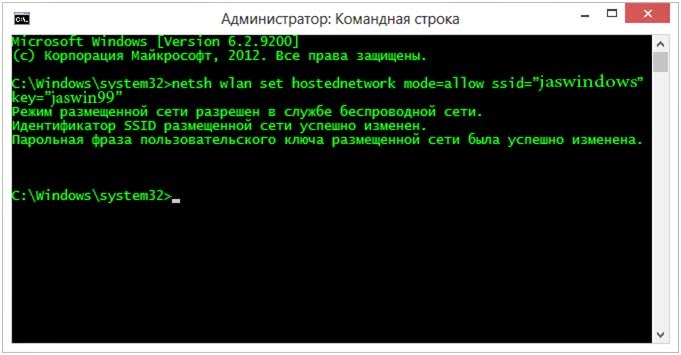
7. After executing this command, you will see that access to the wireless network is open, the name and password have been changed. Now enter the following command
netsh wlan start hostednetwork
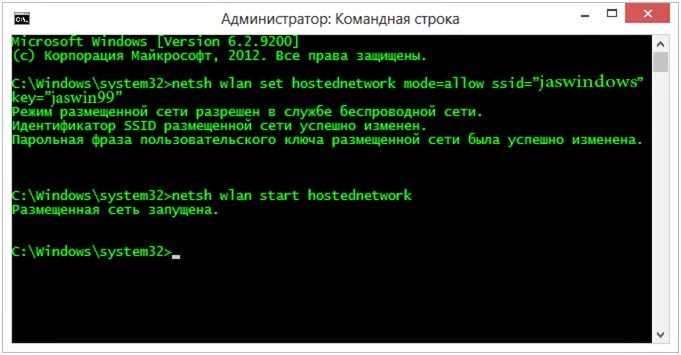
8. After running the previous command, you will see that the network you created is running. There is only one last step left until the finish line. Namely, enter the command at the end (it will allow you to find out the status of your wireless network, how many clients are currently using your Internet)
netsh wlan show hostednetwork

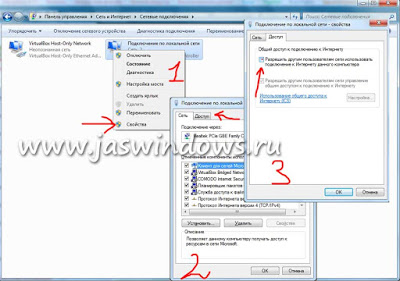
9. Finally, go to control Panel - network connections and in the properties of the connection you need allow me to use general access to internet connection.
That's all ready, you can use the Internet of the person distributing your laptop. To stop wi-fi internet distribution, enter the following command
netsh wlan stop hostednetwork