Step-by-step instructions: how to install Windows XP on a netbook for a beginner. Instructions for creating a bootable USB flash drive for Windows Bootable USB flash drive for a netbook
Cast aside doubts, believe in your abilities, making a bootable USB flash drive for Windows 7, 8.1 or 10 is as easy as shelling pears, and you will definitely be convinced of this. There are several ways to create a bootable flash drive from iso, using different programs - simple and smart, humpbacked and crooked, which one to choose is up to you.
In this article I will try to show you a fairly simple method with 100% efficiency. Whether you like it or not, soon the world of optical drives will sink into oblivion and will never return; everyone without exception will have to learn how to create a bootable flash drive, and in my opinion it is better to do this before than after the OS crash. The thousand-times proven program for a bootable flash drive, Rufus USB, will help you realize your need.
How to make a bootable USB flash drive for Windows 7-8.1 correctly - detailed instructions.
So, correctly creating a bootable USB flash drive 7, 8.1 will require the following from you. Flash drive with a capacity from 4GB to 8GB (depending on the size iso image A). Next you will need a good ISO image operating system, and note - not a shmurdyak reassembled by someone unknown, with a set outdated programs, and 100% working official Windows version 7 or 8.1 (whatever you like). It is this image that will save you from surprises, ensure error-free operation and updating of DirectX, drivers, etc., and allow you to make a high-quality bootable USB flash drive for 7, 8.1.
For those who have problems with the image Windows iso– the disc is scratched, the DVD drive is broken, it’s not in the laptop initially, I’m too lazy to create an image, etc., I suggest using the largest Russian-language torrent tracker and filling this gap. The Win 7 and Win 8.1 images are based on official Microsoft releases, with the addition of a small useful feature - for example, the Win 7 image contains all 32-bit and 64-bit versions from Starter to Ultimate, which, you see, is very convenient.
The second thing we really need is a program for creating a bootable Rufus flash drive. No installation required, just download and run. To avoid any surprises, the name of the folder with the program, the folder with the image and the path to them should not contain Russian letters; use the Latin alphabet - English.
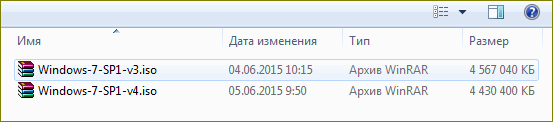
Next to the Rufus program folder, create another one with the intuitive name Windows-7 or Win-8. Opening file manager Total Commander(if you don’t know what this is, it’s time to learn how to operate files correctly) or an archiver WinRAR– unpack the archive with the program, transfer the Windows image from the downloads folder to the created folders.
It remains to voice the last cautionary phase - transferring and storing information that is important to you from USB Flash drive on HDD. The first step in the process of creating a bootable Windows flash drives 7 formatting will be performed - cleaning and re-partitioning of the media.
Step one. We turn our attention to the desktop, double-click to launch the “Computer” shortcut, right click Click on the flash drive shortcut with your mouse. In the menu that opens, left-click on “format”, then what to select and where to click is shown in the picture. We are waiting for completion preparatory process completed, we are 100% ready to make a bootable Windows 7 USB flash drive correctly and the first time.
1. Open the folder with the Rufus program - launch it, in the program window that opens, find “Device” and point to the flash drive, if it is not picked up automatically.

2. The next item is “Partition scheme”, select “MBR for computers with BIOS or UEFI”. If you need to install an operating system on a hard drive with a capacity of more than 2000GB, use “GPT for computers with UEFI”.
3. “File system” - FAT32 can be used with images smaller than 4GB, images larger than 4GB require the use of the file system - NTFS.
4. We leave this item unchanged, the default “Cluster size” is 4096 bytes.
5. “ISO image” - click on the optical drive icon, select the ISO image of the required system in Explorer.
6. Raise your gaze a little higher, set a name that is clear to you for the “new volume label” - in English letters, Win-7 - for example.
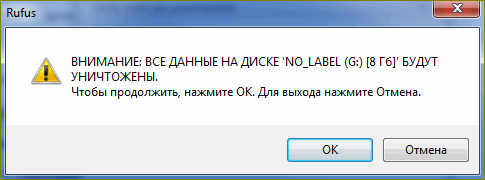
7. We check the correctness of the choice and the next action is to command Rufus to make a bootable flash drive 7, press the “Start” button. The program will issue a warning in Russian, click “OK” and leave the computer alone.
We take our playful hands and carry them to the kitchen, by force of will we force them to pour tea or coffee - we slowly enjoy the drink. This is a simple precaution; by not doing so, you will ensure the continuous creation of a bootable Windows flash drive; you will not be able to cause an error, overload the processor, stupefy the file subsystem, etc.

Depending on the speed characteristics of your PC, after 5-15 minutes you will see the inscription - 8 “Ready” - the bootable flash drive has been created, press nine - “Close”.
That’s actually the whole science, how to make an image of a bootable flash drive - you now know. As you can see, nothing extremely complicated or impossible, the main thing in this matter is to maintain a sequence of actions and you will definitely succeed.
How to make a flash drive bootable inBIOS.
For successful Windows installations from a flash drive, there is only one question left to answer - how to make a flash drive a boot disk in the BIOS? The question is important, because starting the installation differs from your usual order, with DVD disc, which leads to a common mistake and a surprised look.
For those who missed it, let me remind you that in the process of creating a flash drive, we selected the USB-HDD option. The bootable flash drive is recognized exactly as we called it, so there is no need to look for the usual DVD activation in the BIOS section - First Boot Device.
We place the installation flash drive in a free USB 2.0 connector, wait until the PC picks it up, and then reboot. During the system boot process, press Delete or F2 and enter the BIOS. Depending on the BIOS version, the name of the required Boot sector may differ, but the principle of operation will be the same. Open " Advanced BIOS Features".
Next, click on the “BootSeq & FloppySetup” section, find “Hard Disk Boot Priority”, go in and see the list of drives installed in your PC. Your bootable flash drive should be in the last place of honor - this is what needs to be corrected. To make a flash drive a boot disk, we need to move it to the top of the list - using the keyboard arrows (up and down), select flash drive. Next, use the “+” keys and press until the installation flash drive becomes the first in the list. We complete the manipulations in the BIOS by pressing the “F10” (save) button.
In order to make the flash drive bootable in BIOS - UEFI, we find the same Boot sector – Loading, “Fixed Boot Order” opens before us and a sea of “Boot Option” under it - this is setting the system boot sequence. We look at “Boot Option #1” - as a rule, the hard drive or SSD is located there, the system queries it first and the operating system starts loading from there. Click on “Boot Option #1”, find and select the inscription “USB Key:” with the name of your flash drive.
Press “F10” - the installation of Windows 7 from the flash drive has begun, then we wait for the first reboot, go into the BIOS, return the hard drive to first place, and save. After the reboot, the installation will continue, if you missed this moment - refuse to install again, the PC will start to reboot, go to the BIOS - return the HDD to its place.
How to make the image of a bootable flash drive active in the BIOS - and now you know this. The likelihood that you won’t succeed is practically zero - and these are not just words - this has already been proven by more than tens of thousands of users. A little attention plus a sequence of actions - nothing more is required from you. No. 2 - .
Before installing the OS, I advise you to take a look at - I’m sure you will find something interesting for yourself. Well, after successfully installing the operating system, do not forget to tell your friends how to make a bootable Windows 7 USB flash drive correctly - it will be useful for everyone. Good luck!
Best wishes
Denker.
To solve many computer maintenance problems, it becomes necessary to create a bootable USB flash drive. This may be needed, for example, to flash an updated BIOS version or install an operating system.
There are many methods and different utilities for creating a bootable USB flash drive. But often these methods are complex and not user-friendly for a novice user (or require several different utilities).
But nevertheless there is also very simple ways. One of them is to use the rufus utility to create a bootable USB flash drive.
Rufus is a miniature but very fast and functional program. With its help, you can very quickly make a bootable USB flash drive with the desired operating system for installation or maintenance.
Creating a bootable DOS flash drive using the RUFUS program
Consider the option of creating a bootable USB flash drive with DOS system- to perform firmware flashing of all BIOS versions on motherboard computer.
To do this you need to download the program itself
and insert the USB drive (flash drive) that needs to be made bootable. It is advisable to disconnect all other USB media for the duration of the firmware.Then run it with Administrator rights (since the utility will perform formatting, it requires advanced rights)
The program settings should be set as follows:
- On the "Device" tab, you need to select the desired USB drive from the drop-down list.
- "Partition scheme and system interface type" must be set to "MBR for computers with BIOS and UEFI"
- "File system" must be set to "FAT32"
- on the “New volume label” tab, you can set your own name for the bootable flash drive (to make it easier to recognize it among other media in the future)
- Be sure to check the boxes next to the values "Quick formatting" and "Create boot disk"
- next to the item “Create a boot disk”, select FreeDOS from the drop-down list
To complete formatting, click the "Start" button
In this article we will demonstrate a solution to the difficulties that are usually encountered when installing Windows 7 (or other operating systems) on a netbook. For example, we took a netbook ASUS Eee PC 1015pe.
The main advantage of a netbook is its compactness and lightness. This is achieved thanks to the small screen size and lack of CD/DVD drive. The latter fact, in fact, makes it impossible to install the operating system in the usual way from an installation disk. However, fortunately, there are other means.
Creating a Windows 7 installation USB-Flash drive
Let's first of all take a point-by-point look at what we need to create a bootable/installation flash drive:
- USB flash drive
- Installation Windows disk 7 x86/x64 or its ISO image
- WinSetupFromUSB 1.0 program
- Second computer or laptop
WITH USB flash drive , we hope everything is clear. If your netbook supports booting from SD cards, - you can write the Windows installer onto it. In our example, we used a USB flash drive.
It is better to have the original installation disk/image, i.e. DO NOT ASSEMBLE. You can easily find original MSDN Windows images on the Internet. They are perfectly “treated”, and you can always find out exactly how on the Internet. PLEASE NOTE that before downloading the image, check processor capacity Your laptop. ASUS Eee PC, for example, is built on the basis 32-bit processor Intel Atom™ N550. For such processors, the name of the installation image must contain the label x86. For 64-bit processors - x64.
We will also definitely need special program, which will turn our flash drive or SD card into a bootable and installation one. In our example we used WinSetupFromUSB 1.0- the most optimal program in all respects.
And finally, we will definitely need a second computer in order to properly prepare the flash drive. We will perform all the actions described in the next section on it.
Step-by-step instructions for creating a bootable USB flash drive
Download the application, unpack it to any folder and run.
At the top of the window, click on the button "RMPrepUSB". In the window that opens, in the “3 BOOT OPTIONS” field, select the first item (as in the picture), in the “4 FILESYSTEM and OVERRIDES” field, specify the system NTFS, then click on the button Prepare Drive and wait until the procedure is completed.


After the flash drive has been prepared by the previous procedure, close the window RMPrepUSB. In the main program window in the field "Add to USB Disk» select line "Vista/7/Server 2008...". Next, paste installation disk Windows 7 into a computer drive or mount his image on virtual drive(). In the WinSetupFromUSB program window, in the line you select, specify the path to the installation files. In our example, we mounted a disk image onto a virtual DVD drive (disk G: in the screenshot).

Click on the button "GO" and wait until the files are copied.

After everything is ready, the following will appear on the flash drive: Windows installation files 7. Everything, ours installation flash drive and ready!

Booting from the installation USB-Flash drive on a netbook
The next important step is to boot correctly from the installation flash drive. By default, booting on a netbook is done from the internal HDD drive. You can change this option in BIOS.
Before starting your netbook, make sure that flash drive inserted into USB port. Turn on the computer and at boot time click on the BIOS launch button. When loading you will see the following message: "Tap (key) for Setup" or “Press (key) to enter BIOS”. On ASUS laptops this is the key F2. On other netbooks, the BIOS can be launched using keys F10, Delete and etc.
So, in the BIOS we need a section "Boot"(loading). In the ASUS Eee PC BIOS, first of all, you need to set the boot order from drives (priorities of internal-external hard drives, flash drives, SD cards, etc.). Click on the option "Hard Disk Drives" and in the window that opens, first indicate your Flash card.


Return to the main window and on the tab "EXIT" select option "Save Changes & Exit"(“Save changes and exit”).
The next time you turn on the netbook, it will boot from our installation flash drive. You will see this window:
 This is the so-called bootloader, installed by the program WinSetupFromUSB to our flash drive. Select an item “Start Vista/Win7/Server 2008 Setup Or PE/Recovery ISO from partition...” and press ENTER.
Finally, you will see the long-awaited Windows installation window.

Conclusion
You can intuitively understand how to proceed next by following the prompts on the screen. However, let me remind you of one important detail. After all installation files have been copied, the computer will restart. Don't forget to remove the flash drive, otherwise the computer will boot from it again and you will again see the initial Windows installation window. If this does happen, don’t be alarmed. Just remove the flash drive from USB port and reboot your netbook. Windows installation will continue on its own.
As always, we hope that our article helped you. We are waiting for likes, reviews and comments!
For some people it sounds crazy when you explain to them that the new netbook they bought with Windows 7 Starter cannot be installed. in a standard way set the picture to your desktop. Yes, you can install a special program that will hang in memory and constantly display the image on the desktop.
After this, many demand to install their “native” Windows XP and even offer money. Because System Administrator- this is a highly moral being who cannot refuse the money offered, he has to take up work according to reinstalling Windows XP on a netbook without CD-ROM.
For me personally, it is morally wrong to install Windows XP on a netbook with a real and valid Windows license 7, although a Starter, but as they say, the master is the master. Consistent with my moral principles and putting money in my pocket, I install Windows XP on clients' netbooks every time.
I have already installed Windows XP on a large number of netbooks and I can say that, in principle, the algorithm of actions is the same for all of them. For these purposes, I use a popular distribution - ZverCD, which I would not use for personal purposes, since it is a bit heavy. And it’s just right for clients, as it makes it easier to find drivers after installation.
What do we need to install Windows XP on a netbook?
To install Windows XP on a netbook we need:- Windows distribution. I think it won’t be difficult for you to find, since there is a lot of this shit on the Internet. Take at least ZverCD.
- A flash drive or, smarter, a USB drive that can store 1GB of information.
- Program WinToFlash which you need to download from here.
The latest WinToFlash program, in turn, can do one thing - create a bootable USB flash drive with WIndows. In our case with XP.
I would like to say right away that WinToFlash does not work with CDs and ISO images. She works with system files operating system, that is, if you have ISO- Windows image XP, then you need to unpack it with any archiver.
The algorithm for installing Windows XP on a netbook can be described as follows:

If you have a disk with an operating Windows system 7, you can create an ISO image of such a disc using programs such as UltraISO or Nero. You can also download a ready-made image of Windows 7 from the Internet, for example, from the Microsoft website.
To create a bootable USB flash drive for Windows 7, you will need a USB drive with a capacity of at least 4 GB. The flash drive should be formatted, and it is advisable that after formatting the flash drive has file system NTFS.
Installing Windows 7 USB/DVD Download Tool
This official program from the developer of Windows 7 - Microsoft - allows you to quickly create bootable USB devices. You can download this program from the Microsoft website. To install the program, follow the installation assistant instructions. After running the program, in the Source file line, specify the path to the Windows 7 ISO image, click Next. The next step is to specify the type of media on which the system image will be written (USB) in the lower right corner of the program window. In the window that appears, select the required USB drive and click the Begin copying button. The program will issue a warning that all data on the media will be permanently deleted. Click Erase USB Device, after which the program will ask again about your intention to delete all files from the media being used, select “Yes”. As a result, the program will proceed to the process of copying the operating system image to a USB drive. Wait until the copying process completes. Until the program reports that the system image has been successfully copied to the flash drive, do not turn off the computer’s power and do not remove the USB drive.
Using a ready-made bootable USB flash drive
Modern netbooks in most cases do not treat USB devices as the primary boot device. In this regard, it is necessary to configure the BIOS of the netbook on which Windows 7 will be installed from a flash drive. To do this, turn on or restart the netbook and press the DEL or F2 key when starting the BIOS (the required key may differ depending on the BIOS manufacturer). When you press the required key, the main BIOS window will load. Go to the Boot tab, select the Hard Disk Drives line and press Enter. In the window that opens, highlight the line 1st Drive, press Enter and select a USB drive from the list. Press Esc to go back to the Boot window and go to the Boot Device Priority section. Here you should also specify the USB drive in the 1st Boot Device line. Save BIOS settings and click Exit.