Disk cleanup before installing windows. How to clean your hard drive from unnecessary files? Programs for full disk formatting
Over time, on the main partition of the hard drive, which is called the letter C by default, a large amount of necessary files, taking up a lot of space. Since the disk allocated for the system and system elements most often has a small volume, the presence of temporary files and files left over from deleted programs can lead to the fact that free space on the disk becomes catastrophically low. Manually deleting files from this drive is very difficult because they may be located very deep in the folder system, and it is also dangerous because you can accidentally erase items that are necessary for the computer to function correctly. To clean safely system disk In Windows 10, your best bet is to use the built-in Disk Cleanup program.
Windows 10 Disk Cleanup: Built-in Tools
There are several ways to open the Disk Cleanup program in Windows 10. Remember that you should only use it if drive C is full, and you can clean it by deleting third party programs, there is no possibility.
Through command execution
Via control panel

How to use the program
- In the “Disk Cleanup” block, you need to check all the departments that you want to clean.
- Having selected a department, you can read all the information about what it contains, as well as view the files that belong to this section by clicking the “View files” button.
- To proceed to removing system files, click the "Clean" button system files" You will need administrator rights to access this feature. But it is better not to remove any elements of the system, as this may lead to system breakdown or incorrect operation.
- In the “Advanced” tab, you can proceed to remove unnecessary programs by clicking the “Clean” button in the “Programs and Features” block.
- In the “System Restore and Shadow Copies” block, you can click the “Clean” button to proceed to deleting unnecessary recovery points that also take up space on drive C. It is not recommended to delete all points, and it is also better to save one or two of the last ones in order to always have the ability to roll back the system if some error occurs that cannot be corrected by other methods.
- Once you have selected which partitions you want to clean and have ticked them, click the OK button to begin the process. Do not interrupt the cleaning process or turn off the computer so that no errors occur and all files are deleted correctly.
Advanced Cleaning
Each user with administrative rights has the ability to run Disk Cleanup from big amount points than is available during normal startup.

What to do if the application does not start
The program may not open using any of the above methods only because the file responsible for launching the application is not in the default path. Try to find this file manually, it may be located in the following path: C:\WINDOWS\ServicePackFiles\i386. If it is not there either, or the folder itself does not exist, then there is only one thing left to do - use third-party programs to clean up the disk.
How to clean up drive C on Windows 10 using third-party programs and applications
There are many programs that allow you to clean your hard drive from unnecessary and temporary files. Many of them are distributed on the Internet for free and are in no way inferior to the built-in Disk Cleanup program. Next, we will consider the most popular, convenient and easy-to-use applications.
CCleaner
The positive aspects of this program include the following qualities:

Kaspersky Cleaner
A program from a well-known campaign that previously specialized only in antiviruses, but has now started producing applications with other tasks. You can download Cleaner from Kaspersky from the official website by finding it in the general list of all programs -
The main advantage of the application is its simple design, which allows you to complete all the necessary tasks by pressing one “Start scanning” button.
Also, if you don’t like the changes made by the program after the last session, you can cancel them by clicking the “Cancel Changes” button in the main menu.
What can cause your hard drive to fill up?
If you have cleaned up your disk using one of the above methods, but have not freed up enough space, try the following:
- Manually go through all the files stored on the drive and see which ones can be moved to another drive or deleted. Do not touch system files and programs; you can only move and edit elements that you personally added.
- Remove unnecessary third-party programs that are definitely not useful to you.
- Check your computer for viruses. Perhaps the virus itself takes up some of the free space or regularly downloads advertising files and applications that clog up the disk.
It is recommended that you clean out the C drive regularly, as how busy it is will determine how quickly the computer can find the files you need and present them to the user. That is, if drive C is overloaded, the system runs slower. And also, all browsers and other programs send temporary files and cache to the main disk by default, and if there is no space on it, then there will be nowhere to store the necessary elements. Based on all the problems described, we can conclude that it is worth cleaning the disk using special programs at least once a month.
During its operation, the Windows 7 operating system accumulates a lot of garbage and unnecessary files. This is usually a consequence of system updates, unpacking archives and browsing the Internet. The system itself has standard utilities for removing junk, but they do not start automatically and periodically you need to clean it manually.
Manually deleting temporary files via the command line
Removing unnecessary files and directories from hard drive produced using internal team"DELete". This can be done either from operating system, and when starting the computer when Windows 7 is not yet loaded.
To delete an individual file, enter the “DEL” command and the file name. To delete a group of files (for example, all temporary files that have the TMP extension), you can use the wildcard character: “DEL *.TMP”.
To delete temporary files via command line, do the following:

In the same way, you can delete unnecessary directories, but instead of the “DEL” command, “DELTREE” is entered.
Using DOS wildcards - simple, but powerful and dangerous. This method requires precise knowledge of the location of files and directories - it is not entirely suitable for untrained users.
If you are not using any of the file shells in which directory files are visible, it is recommended that you view their listing with the “DIR” command before deleting files. For example, if you intend to delete all files with the TXT extension, before entering the “DEL *.TXT” command, you should play it safe and view them with the “DIR *.TXT” command.
Manually clearing the Temp folder
In the Windows 7 operating system, there is a separate folder for storing temporary files. It contains files and directories that remain after installing programs, unpacking various archives, and surfing the Internet. To remove them, do the following:

You can also get to this folder as follows:

Removing unnecessary files using the Disk Cleanup utility
Disk Cleanup is a program built into the operating system that removes unnecessary junk from your computer. With its help, you can find many files that have not been used for a long time. Removing them will increase the efficiency of your computer. All temporary and unused system files will be deleted and the recycle bin will be emptied.
To start cleaning, do the following:
- Open the Start menu and click on All Programs.
Expand "All Programs"
- Go to the "Accessories" folder, then "System" and run the "Disk Cleanup" utility.
Run the Disk Cleanup utility
- Select the disk to clean and click OK.
Select the disk to clean
- Mark the items you are interested in and click OK.
Check the items you are interested in and click OK
You can also access this utility in the following way:

Removing unnecessary programs using a standard utility
Besides system garbage, long-forgotten programs or virus software may be installed on your computer. To remove them, do the following:
- Open the Start menu and go to Control Panel.
Open Control Panel
- Click "Uninstall a program."
Click "Uninstall a program" when categorized
- Right-click on the program you don’t need and select “Uninstall.”
Remove all unnecessary programs
- After regular removal go to the Program Files park on drive C and erase the folder belonging to the remote application, if it is there.
Overwrite the remaining folders
How to clean a disk of junk on Windows 7 using third-party programs
Using specialized programs, you can clean your hard drive most effectively, maximizing your computer's performance.
- Wise Care 365;
- Glary Utilities;
- 360 Total Security;
- Your Uninstaller.
You can easily find all the above software on the Internet.
Wise Care 365
Wise Care 365 comes in free and paid versions. It cleans the registry, local disk, allows you to edit startup, optimizes the operation of many applications and the operating system itself. If you use it constantly, you can avoid various crashes and freezes on your computer.
- Launch the program and click the "Check" button.
Immediately after starting the program, run a system scan
- After completing the check, proceed to correct all errors found.
After receiving the scan results, correct any errors found
- Go to the “Cleaning” tab and click on the big green button in the “Registry Cleaner” section.
Click on the "Cleanup" button to heal registry errors
- Now open the “Deep Cleaning” section and run a scan.
Click "Scan" under "Deep Cleaning"
- Then click “Cleanup” to fix any errors found.
Once the deep scan is complete, click "Cleanup"
- Go to the “Optimization” tab and run defragmentation of the hard drive.
Run hard drive defragmentation
- Now disable autorun programs in the appropriate section.
Disable startup programs
Glary Utilities
Glary Utilities comes in free and paid versions. This program cleans and restores the registry, analyzes disk space, deletes temporary files, defragments the disk, and also has many other functions.
- Launch the program, go to the “1-Click” tab and click “Find problems”.
Go to the 1-Click tab and click Find Issues
- Wait until the scan is completed, go to the “Modules” tab and click “Erase traces”.
Click on "Erase traces"
- Wait until the analysis is completed and click “Erase traces.”
Click "Erase Traces"
- Check the required items in the left panel and close the window. Then restart your computer.
Mark the items that interest you and close the window
360 Total Security
360 Total Security is free antivirus program, based on the Avira and Defender engines. This program does not conflict with other antiviruses and has a number of additional advantages. It allows you to clean the system of unnecessary files, optimize startup applications, search for vulnerabilities, compress the disk, and can generally speed up your computer.
- Immediately after starting the program, run a system scan.
Run a system check
- Once errors are found, click "Fix".
Click "Fix"
- Go to the “Cleaning” tab and start scanning.

The state of your computer's hard drive affects speed Windows operation 7, since the system actively uses the free space of the drive for its own purposes. The disk stores installed applications, user data, as well as temporary and service files. A cluttered drive is slow, slowing down your entire computer. It's time to clean up the mess and completely clear the disk of debris.
Why do you need to clean your hard drive?
Three reasons to clean your disk
- Need for free space. For the user, installed applications and Windows 7 itself requires a significant amount of free space on the drive. Many manufacturers software They even indicate this parameter as one of the most important when describing the requirements for computer hardware.
- Work stability. Non-existent links, broken files with reserved names, leftovers remote programs and drivers often cause system and installed application failures. Digital junk accumulated on your hard drive makes Windows 7 unpredictable.
- Speed of work. Empty and useless files clog up the disk and put additional stress on the file system, slowing down Windows 7.
Where does garbage come from?
- Caching. Network browsers use the hard drive for “caching,” that is, intermediate storage of information downloaded from the Internet, as well as increasing the speed and stability of work. Unfortunately, they do not like to erase recorded information after finishing work.
- Temporary files. Many applications create temporary storage of service information on disk: current settings, clipboard, intermediate copies, and much more. They also do not try to clean up this information on their own - the disk gets clogged.
- Leftovers remote applications. The uninstallation procedure does not always go flawlessly; incomprehensible files and entire folders are often left behind, which the user has no longer needed for a long time.
- Windows 7 files. The operating system creates many temporary, intermediate and working files. Emergency exit, random failures and software conflicts turning many of them into digital waste.
Manual cleaning methods
Using the Disk Cleanup utility
The system hard drive cleaning utility erases temporary and unused files, and also cleans the recycle bin.
To launch the utility, click the on-screen “Start” button, then select “All programs” in the left column. In the drop-down list, click “Standard”, then the “Service” folder.
From the list of utility utilities, select “Disk Cleanup”.
You can get to the same window using the search bar. To do this, click the “Start” button and type “Disk Cleanup” in the search bar. Go to the active tab with the same name.
The most in a fast way to launch the utility is to use the “Run” window: press the Win key combination (with Windows icon) and R. In the small window that appears, type cleanmgr.exe in the input line and click “OK”.
The utility begins with the appearance of a small window in which we are asked to select one of the available logical drives for cleaning. Select the device and click “OK”.
Windows 7 immediately starts scanning the disk for potential candidates for deletion.
After finishing the analysis, the utility prompts you to select categories of files to be deleted. Some of them are already marked by default, the rest do not contain marks. For greater clarity, the box contains brief information about why the system perceives this information as garbage.
Having finished making your choice, press the “OK” screen button and confirm your decision. The procedure has started.
Advanced cleaning options are provided by the “Advanced” tab in the same window. However, it will only be visible to users with administrator rights. Therefore, first we will restart the utility as an administrator. To do this, having reached the already familiar “Disk Cleanup” menu item, click on it right button mouse, and in the opened context menu select “Run as administrator”.
After selecting a logical drive and completing the analysis, the “Disk Cleanup” window has a new “Advanced” tab. Let's move on to it.
The top “Clean” button leads to the “Programs and Features” system window with a list of applications installed on the computer. One way to increase the amount of free disk space is to remove some applications.
We select applications that we can do without and delete them from the hard drive.
The bottom “Clean” button offers to free up some of the full space by deleting system restore point and shadow copy files. The savings in this case come at the expense of safety. Additional restore points may be useful if, for example, the last one was created on an infected malware computer. Shadow copy files also store old copies user files, which can help with damage to the main ones. Therefore, the utility prompts you to confirm your desire to delete this information.
Through Windows Explorer
One of the most frequently used and familiar applications to any user is Windows 7 Explorer. Many actions to clean up the hard drive can be performed directly from it.
The Recycle Bin stores files deleted by the user in case they need to be restored. This is one of the reasons for system messages about lack of space on the hard drive, even when a lot of information has just been deleted - everything has been moved to the Recycle Bin. Let's clean it up.
To do this, select “Trash” in “Explorer” and right-click on it. In the context menu that opens, go to the “Empty Trash” line.
“Explorer” will ask us again if we are sure of our desire to permanently delete what is in the “Trash”, and after confirmation it will clean it. There will be more disk space.
Now let's move on to the disk itself. The already familiar cleaning procedure can be launched from Explorer. To do this, first select the logical drive that we plan to free from unnecessary information, for example, the main system drive C:\. Move the mouse cursor over it, press the right button, and in the context menu that appears, select the “Properties” line.
The Properties: Local Disk (C:) window contains several tabs. First, go to “General”. Here you can see data on the availability of free space on the drive, as well as the “Disk Cleanup” button we need. Click it and you will be taken to the familiar window of the profile utility.
The “Service” tab contains buttons that launch other useful functions:
- “Run check” - scans the disk and searches for errors.
- “Run defragmentation” - grouping information more convenient for file system way.
- “Archive…” - the ability to create a copy on another medium important information in the form of an archive.
After cleaning the main disk, you need to do the same with the remaining logical devices.
System performance will increase significantly if you free up enough space on the system drive (C:\), for example, by moving user information to other devices using Explorer.
System Settings
To reduce the size of temporary files, created by Windows 7, you can change some system settings. However, this should be done by experienced users, since incorrect edits can disrupt the system.
Let's reduce the size of the swap file. Part of the disk space is used by the system for virtual expansion of RAM. The created paging file has a significant size, approximately equal to the volume random access memory. For most applications, reducing the amount of virtual memory will not lead to negative consequences, so you can reduce it.
Press the “Start” on-screen button, type “System” in the search bar and go to the active line with the same name in the list of search results. In the large “System” window that opens, click on the “Advanced system settings” tab, which is located on the left. In the small “System Properties” window, go to the “Advanced” tab, in which we click the top on-screen button “Options”, which relates to the “Performance” item. The Performance Options window opens.
The window shows the size of the paging file. To reduce it, you need to click the "Change" on-screen button and set the new size or location on other disk devices.
Next, you can disable the hibernation function. This feature is especially useful for laptop owners. In normal sleep mode, the main consumers of computer energy are turned off (monitor, processor, hard drive), but the RAM is not de-energized. This allows you to quickly start working from the same place where it was interrupted, but it is fraught with problems if the battery runs out - the data in RAM will be lost. The hibernation utility saves the contents of RAM on the hard drive and completely shuts down the computer. When work resumes, the data is again loaded into RAM.
The advantage of hibernation over sleep mode is energy independence, but the disadvantage is the need to create a large file on the hard drive to store the contents of RAM. Therefore, if the user does not plan to use hibernation, it can be disabled, thereby freeing up additional free space.
Click “Start” and enter “Power Options” in the search bar. Let's go to the tab of the same name.
In the power plan selection window, the current mode is highlighted with a switch label. Click the active line “Setting up a power plan” next to it.
Now you need to disable putting your computer into sleep mode. To do this, in the “Put the computer to sleep” drop-down lists, select the “Never” option, and then click the “Save changes” on-screen button.
In the same window, select the “Change advanced power settings” tab located just below. A small “Power Options” window appears with a list of parameters in the main part. We find “Sleep” among them and consistently set the values to “Never”.
Now the hibernation file will not be created. But you need to erase the one that is already on the disk. To do this, use the “Run” window, which is called by the Win + R combination. In the input line, type the command powercfg –hibernate –off and press the “OK” on-screen button.
If you later need to undo your changes, you will need to use the powercfg –hibernate –on command.
Special programs for cleaning debris
CCleaner
One of best programs CCleaner hard drive care even in limited free version has excellent functionality. The application interface is organized in a convenient matrix form, simple and clear. The first tab is called “Cleaning” and contains the Windows and “Applications” tabs, each of which contains a list of potentially garbage groups of files created by system utilities or applications. By default, the user is offered the safest option for choosing what is considered unnecessary information, but changing everything is quite simple: just check or uncheck the box next to the filegroup name.
Having decided on the list, you can estimate the potential amount of freed up space by clicking the “Analyze” button.
If the results of the analysis do not suit us, we can reconsider the selection options in the bookmarks. It might be worth clearing the extra group. Otherwise, click “Cleaning”, confirm your intention and start cleaning.
CCleaner also provides handy tool for uninstallation unnecessary applications. The “Uninstall Programs” utility is located in the “Tools” folder. The list occupies the main part of the window, contains all the basic information about applications and two removal options. The “Uninstall” on-screen button launches the built-in uninstallation utilities of the applications themselves; “Delete” forcibly erases the program and its traces in the system.
The package contains the ability to clean not only the hard drive, but also the registry, startup list, and external media. To erase confidential information beyond recovery, you can use the Disk Erase utility.
An additional advantage of the CCleaner package is its flexible settings system, which allows you to set the frequency of automatic cleaning, exceptions to the deletion rules, or additional restrictions on the age of temporary files.
Video: how to install and use CCleaner
TuneUp Utilities (AVG PC TuneUp)
The comprehensive system optimization package TuneUp Utilities has been partially renamed after the rights to it were sold to a new owner. The application consists of a large set of utilities, some of which are designed to combat digital junk.
For user convenience, the utilities are combined into large blocks, including “Free up disk space.”
The package is very easy to use, the interface is simple and friendly. Of course, you should start working by launching the scan, located in the “Maintenance” block.
Then we select the “Free up disk space” block we need and run the procedures contained in it.
Basic hard drive cleaning utilities:
- Disk Cleaner. Clears the hard drive of unnecessary information. These are mainly temporary system and application files.
- Disk Space Explorer. Reveals hidden disk reserves by compiling a list of the hundred most capacious files on the drive.
- Duplicate Finder. Searches for files in different places on the disk. Clones are detected even if they have different names.
- Browser Cleaner. A separate utility that cleans damaged and outdated files created by one of several dozen of the most famous browsers.
The disadvantages of TuneUp Utilities include the aggressiveness of the default settings, so it is better not to use them without adjustments, so as not to lose important and necessary files or programs. This is easy to do, just select the icon in the upper right corner of the screen. In addition, many users complain about bad job disk defragmentation utility, which is set by default. It is imperative to remove it from the settings and use other applications for defragmentation.
On the other hand, the package has a built-in function for creating restore points, so with due care you don’t have to worry about dire consequences.
The package is paid, providing the opportunity to test without paying for two weeks.
Video: AVG PC TuneUp 2014 - review and review
RevoUninstaller
The strength of the Revo Uninstaller package is a set of utilities for uninstalling programs that thoroughly clean the computer not only of executable modules, but also of working folders, temporary files and other traces.
The package interface is very friendly and understandable. For user convenience, recently installed programs are separated into the “New Programs” group. This is needed, for example, to track “uninvited guests” who become attached to a popular free utility and are installed on your computer by default.
Removal occurs in several stages. First, Revo Uninstaller performs preparatory actions: analyzes the application being removed, creates backup copy registry and, if necessary, even a system restore point.
The removal procedure is very clear and is accompanied by graphical and digital data.
Having completed the removal of the main part, Revo Uninstaller scans the disk, looking for all remaining folders and files related to the erased application. The results are presented to the user in the form of a list, which by default contains deletion marks. If you need to leave something on the list, just uncheck it.
Then the registry is cleaned of references to deleted elements.
Among other features of the package, it is worth mentioning utilities for cleaning the history of browsers, Windows and MS Office, as well as guaranteed removal of confidential information.
An additional advantage is that the package is distributed free of charge. The only requirement of the developer is registration for a certain time.
Video: Revo Uninstaller review
SlimCleaner
The developers of the free SlimCleaner package approached the issue of cleaning the system and optimizing computer performance from the position of true democrats: best settings and programs are determined through surveys. The created online community of users shares positive and negative reviews, on the basis of which a decision is made about the usefulness of the applications and a final rating is given.
Cleaning begins with analyzing the contents of the hard drive. You can first adjust the list of categories of potential waste.
The program works very quickly, the analysis does not take much time.
The scanning results are presented in a visual form. To get more detailed information about the contents of file garbage, you need to double-click on the line of interest.
The program also presents user ratings of programs installed on the computer.
You can not only see the final grade, but also find out what it came from, as well as read positive and negative reviews other users.
Similarly analyzed additional settings and toolbars for major browsers. Not all of them deserve the right to be on the computer.
The Disk Cleanup utility very clearly presents the scan results, shows the heaviest directories and files, including system virtual memory and hibernation.
The developers of SlimCleaner declare the function of intelligent disk defragmentation, which differs from the usual setting for the personal characteristics of the computer. Of course, the package contains utilities for guaranteed erasure of confidential information, including on external media.
Auslogics BoostSpeed Disk Cleaner Utility
Auslogics BoostSpeed, a powerful computer optimization package, contains several utilities for cleaning your hard drive from unnecessary information. They are collected in the “Disk Space” category and clearly show the possible positive results of the work.
- Disk Cleaner scans the drive and generates a list of files that can be deleted. By default, file garbage includes temporary files of the system, media players, Java, instant messengers and some other programs, as well as the cache. There is the possibility of a more careful approach: by selecting the “Mark only safe” option, you can be sure of safe deletion.
- Duplicate File Finder is designed to search for copies of files in different places on the disk. The application finds copies of photos, music tracks, documents, applications and prompts the user to get rid of them.
- Disk Explorer shows the files and folders on the drive in terms of the space they occupy. The user can see exactly what data has “eaten up” the free space, and even rank the top hundred of the largest files.
Auslogics BoostSpeed is a universal optimization package, so its hard drive cleaning functionality is inferior to many other packages. An additional disadvantage is the paid distribution of the application.
Video: AusLogics BoostSpeed 9
SlimComputer
The main task of SlimComputer, another package from a developer already known to us, is to search and remove useless, harmful and simply bad programs from your computer. The manufacturer constantly monitors new applications, collecting user reviews and compiling its own utility rating of utilities.
Work begins with scanning, the settings of which can be changed on the main page.
After completing the scan, SlimComputer presents the applications found on the computer in the form of a list with a visual color description of its usefulness.
Here you can start the uninstallation procedure for selected applications by clicking on the large on-screen button in the lower right corner of the screen.
The same principle applies to the evaluation of found browsers, including the plugins installed with them.
If you wish, you can get detailed information about the utility, including positive and negative reviews about it.
Video: SlimComputer review
How to prevent your hard drive from becoming cluttered
They say that a wise person differs from a smart person in that he does not get into situations that a smart person knows how to get out of. Cluttering your hard drive will not become a problem if you train yourself to maintain order at every stage of working with information.
Disk partitioning
If your computer has several logical drives, then you need to determine the specialization of each and strictly adhere to it. For example, a system disk is for Windows and basic software, another is for additional, entertainment or test software, a third is for user information, storing work files and settings. Such organization of the drive will allow the system to operate as quickly as possible, and will also facilitate backup working files.
Folder for temporary files
Create a separate folder to store your own temporary files: photos and videos downloaded from the network, saved documents from mail, torrents, and the like. If necessary, it will be much easier to clean out one directory than to search for garbage throughout a clogged disk.
Installation control
Free packages love in automatic mode installations add unnecessary programs “by default”. These can be browsers, pictures, advertising files, desktop icons and other garbage. Therefore, always open the list of installed utilities and ruthlessly disable everything unnecessary.
System restore points
After cleaning and optimally configuring your computer, create a backup system restore point on the same day. All accumulated errors, file garbage and incorrect settings will be cleared when Windows rollback 7. Don’t forget to save your work files on a separate external drive.
Digital junk causes your computer to slow down, your operating system to crash, and your disk to run out of free space. If you handle information correctly, you can get by with systemic Windows capabilities 7, but it is better to use a special program. Permanent erasure of confidential information, removal of unnecessary programs with all traces of their presence, regular automatic cleaning - these useful functions are available even in free packages.
Sooner or later, the computer owner may be slightly disappointed. It is completely disappointing to discover that the hard drive suddenly becomes completely overloaded, as the system itself actively declares. It’s even sadder if it’s the system disk that is overloaded.
When the hard drive is overloaded, it needs to be cleared of junk files
In this case, you don’t have to be surprised at all why the computer began to work slower, why it freezes and slows down quite often. If you also encounter this problem, then you need to help your computer get rid of unnecessary junk. Cleaning the hard drive or a separate disk space on it helps with this.
To successfully cope with such a task, an experienced user will need only a few minutes. For a beginner, such a task seems overwhelming and difficult to complete. However, this is only a prejudice arising from ignorance. It will continue until the beginner studies the instructions on how to clean the hard drive on Windows 7.
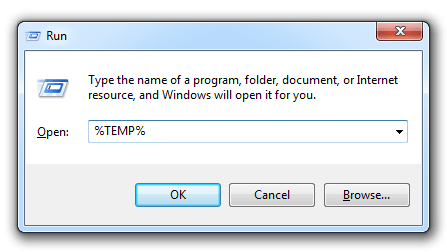
A lot of unnecessary things are stored in the “Temp” folder, and this is what you should clean out. To open the “Temp” directory, launch the “Run” utility by pressing the “Win” and “R” keys simultaneously, enter “%temp%” in the white window, then press “Enter”.
After opening a new window, click the “Alt” key. Now, in order for you to be able to see the “garbage” that needs to be removed, it is important to display it, since it is hidden.
To display hidden files, open the “Control Panel”, find the “Folder Options” line, click on it. Now a new window will open, in which go to the “View” tab. There you will find a block called “Advanced Settings”.
In it, scroll the slider down to find the line “Show hidden files", check the box next to it, click "OK".
Now all hidden files will be visible, select everything you see and delete. Of course, if there are too many files, it is unreasonable to select one at a time, so you can optimize the process of performing such actions.
Click on any file, and then hold down two keys: “Ctrl” and “A”. After deleting the selected files, be sure to delete everything from the Recycle Bin. Now you can make sure that the hard drive was able to get rid of excess “garbage”.
By the way, by getting rid of temporary files, users often also quickly get rid of viruses, which often choose the “Temp” directory as their temporary refuge.
Removing system files
System files are important for the correct operation of Windows, so you can’t just delete everything without understanding what the file’s purpose is and what its meaning is. However, by following the instructions of experienced users, you can say goodbye to those system objects, which are not directly needed for the operation of your PC.
You can completely disable the page file. Open the “Control Panel”, find the “System” parameter, click on it, now on the left side of the window that opens, find the line “Advanced system settings”, click on it too.
Now a new small window will open, in which go to the “Advanced” tab. In the first “Performance” block, click on the “Options” button. After this, a new window will open again on the screen, in which you will also have to go to the “Advanced” tab.
In the lower block " Virtual memory» Click on the “Change” button. In the window that opens, find the line “No paging file”, place a dot next to it and finally click “OK”.

Some users decide to delete the hiberfil.sys file. It is responsible for saving all settings when the computer goes into sleep mode. hiberfil.sys takes up a huge amount of space, sometimes reaching 5GB. Think carefully about whether it really matters to you that your computer starts quickly after waking up from sleep mode. If you are ready to say goodbye to hiberfil.sys, move on.
Launch the “Run” utility by pressing two “Win” and “R” keys at the same time, now enter powercfg-h off. Then the system will do everything automatically.
Alternative cleaning
If for some reason you would not like to use standard methods cleaning found in Windows, you can use other alternative methods, thanks to which the hard drive can also get rid of unnecessary “Garbage”.
You can download special programs, which automatically clean disks, or you can use the BIOS.
Possibilities
When installing an operating system, you sometimes have to use it to set up the startup disk.
During the subsequent installation process, it is possible not only to completely remove everything from the hard drive, but even to format it.
Even if there are viruses hidden somewhere on the hard drive, and you couldn’t find them, you can easily get rid of them through formatting. At the same time, you will achieve the desired expansion of free disk space.
Experienced users can easily share how to clean a hard drive through BIOS. There is nothing complicated in this procedure, but you will have to be careful during the manipulations.
So, to carry out the formatting procedure via BIOS, make sure to purchase a boot disk or recovery disk.
Best to have boot disk, then you will be able to format the disk space through the BIOS, and then immediately install a new Windows.
Insert the boot disk into the drive, restart the PC, and during the next boot, press the “Delete” button; in some versions you have to press the “F2” or “F8” buttons.
Enter the BOOT section, set the boot option from the drive, after which a welcome message will appear, and then immediately install the operating system. The next step is to select the disk space that you want to clear through the formatting procedure.
Select the system partition by clicking on it; several action options will immediately appear below. You should select “Format”, the process will begin, in a few minutes the disk space will be as if new.

All subsequent actions will depend on your desire, you can continue the Windows installation procedure, or you can complete the process here, since you have already definitely achieved your goal. After some time, you can return to your PC and install the OS that you have now removed.
So, the process of removing unnecessary “garbage” and complete cleaning disk space is simple. You should only try once, test your skills in practice, and after a while you yourself will not notice that you have already become a pro in this matter.
Good day.
Despite the fact that modern hard disks volume is already more than 1 TB (more than 1000 GB) - there is always not enough space on the HDD...
It’s good if the disk contains only those files that you know about, but often the space on the hard drive is occupied by files that are “hidden” from view. If you do not clean the disk from such files from time to time, quite a large number of them will accumulate and “take away” space on the HDD can amount to gigabytes!
In this article, I would like to look at the simplest (and most effective!) methods for cleaning your hard drive from “garbage”.
What is usually classified as “junk” files:
1. Temporary files that are created for programs to operate and are usually deleted. But some still remain untouched - over time, not only space is wasted, but also the speed of Windows.
2. Copies of office documents. For example, when opening any document Microsoft Word A temporary file is created, which sometimes is not deleted after closing the document with the saved data.
3. The browser cache can grow to obscene sizes. Cash is special function, which helps the browser work faster by saving some pages to disk.
4. Basket. Yes, deleted files go into the basket. Some people don’t keep track of this at all and their files in the trash can number in the thousands!
Perhaps these are the main ones, but the list could be continued. In order not to clean it all manually (which is time-consuming and painstaking), you can resort to many utilities...
How to clean HDD using Windows
Perhaps this is the simplest and fastest, and not a bad solution for cleaning up the disk. The only drawback is that disk cleaning is not very efficient (some utilities do this operation 2-3 times better!).
First you need to go to “My Computer” (or “This Computer”) and go to the properties of the hard drive (usually the system drive, on which a large amount of “garbage” accumulates, is marked with a special icon). See fig. 1.
2. Remove unnecessary files using CCleaner
CCleaner is a utility that will help you keep Windows system clean, and also make your work faster and more comfortable. This program can remove junk behind all modern browsers, supports all Windows versions, including 8.1, can find temporary files, etc.
To clean your hard drive, run the program and click on the analyze button.
Rice. 3. CCleaner HDD cleaning
Next, you can check the boxes to indicate what you agree with and what should be excluded from the deletion. After you click “cleanup”, the program will do its job and give you a report: how much space was freed up and how long this operation took...
Rice. 4. removing “extra” files from the disk
In addition, this utility can remove programs (even those that are not removed by the OS itself), optimize the registry, clean startup from unnecessary components, and much more...
Disk cleaning with Wise Disk Cleaner
Wise Disk Cleaner is an excellent utility for cleaning your hard drive and increasing free space on it. It works quickly, is extremely simple and intuitive. A person even far from the level of an average user can figure it out...
Rice. 7. Report on found “junk” files in Wise Disk Cleaner
Overall the program works quickly. From time to time it is recommended to run the program and clean your HDD. This will not only add free space on the HDD, but will also increase your speed in everyday tasks...