Setting up a GPS car radio with your own hands. Is it possible to connect a navigator to a car radio? Is it possible to connect a navigator to a car radio?
Navitel is a navigation software for GPS, providing drivers detailed diagrams roads and additional functions. To obtain detailed navigation information, it is enough to have a navigator and an installed software application.
The advantage of the recommended software is the free download format. For most GPS units supplied to Russia compatible devices, including radios, the Navitel card for the radio is installed by the manufacturer. This is a cross-platform system that provides flexible integration with devices of any type.
Standard navigation equipment for the car
Some things quickly become familiar. This is exactly what happened with multifunctional 2 din radios, which combined a number of functions, including navigation. Let us remind you that the standard version is always developed for a specific model and is flexibly integrated with the functions of the car.
The modern concept of equipment, including GPS radios, is developing within the framework of “plug and play” functionality. Manufacturers of standard versions of radio tape recorders, regardless of where the device was manufactured - Chinese, European, whether it was released in Singapore or South Korea - usually pre-install all the necessary software at the factory or in the dealer’s workshop.

The most popular navigation program
Navitel is the most popular version of navigation data with quite wide functionality, which is positively noted by car owners. You can download Navitel for radio for free if it is not already installed. This can be done in several ways, for example: synchronize and transfer data from a smartphone, write to a flash card, download from the Internet using a 3G modem connected to the standard radio or included in the kit.
Theoretical part of the installation
Regardless of how you are going to install the application, there are usually no problems on any of the versions, adapted or not, Chinese or Korean devices. The update usually occurs automatically when connected to the network. If you have a standalone version (without a modem), you will have to periodically update manually; for this you need to first install the software using the correct torrent or the official website. The update will help you use all available options and functions.

Although this is obvious, it is worth noting that the application is only suitable for devices with a screen or to which a screen is connected. Usually we are talking about 2 din format. Installation usually involves automatic setup software parameters for the device format. So the installation, which can always be updated, will work correctly with all the technical capabilities of the radio.
The installation and software package will be slightly different depending on the type of device. Chinese equipment is usually made on Android, in some cases on Windows, therefore, it is necessary to install the installation specifically for the specified operating systems.
Navitel installation instructions
Navitel installation is usually needed for devices that are not adapted for Russian market or having a lower cost. A typical device supplied to the Russian market already has pre-installed programs with a license. You may encounter this situation if another navigation application is installed, and you would like Navitel. You can see what the device with the program looks like in the photo. In some cases, Chinese Navitel radios do not have Russian firmware, so you need to worry about this before following the recommendations.
Please note that you can get the installation version for free, but you will need an activation code. It is purchased separately and for a fee, and subsequently allows you to update the program. If you're not happy with that, use a torrent.

Application installation:
- follow this link ;
- connect the navigator to any device, it will appear as a separate disk;
- go to the website to the required installation package (Android or Windows CE);
- transfer the installation folder and run the installation application;
- After that, carry out activation following the prompts.
The program gives fairly accurate explanations, so that it will be easy for any user to install the Navitel program.
Activation, counterfeit applications and other features
The manufacturer offers to install the application completely free of charge, try it on your device and, if necessary, purchase an activation code. You can find many counterfeit versions on the Internet, usually they belong to previous releases of the application. The main disadvantage of such an installation is not only the actual violation of the law, but also the lack important updates, as well as difficulties in using other useful functions.

Available functionality:
- Navitel Friends option - allows you to determine the location of friends by their device. A very useful function for relatives or traveling in sparsely populated areas;
- Navitel is trying to meet user expectations, and new applications are currently available: the version for smartphones and tablets is available with a different set of maps: for Russia, for your district, nautical charts, Central, Eastern or Northern Europe, Adriatic.
The activation cost starts from 900 rubles, this price order is not worth the difficulties that can be expected when using counterfeit versions. It is not always possible to hope that maps correspond to reality. This, especially on long journeys, makes the journey quite difficult.
It can be noted that the application works correctly with all available features and on all devices; it can be updated for free at any time. We suggest you install Navitel on your radio latest version right now.
Very often, car owners think about how to get maximum functionality with minimal investment. Let's say your car has a radio installed that suits you. You just need to purchase and correctly connect a GPS navigator to the radio to get a full-fledged multimedia system with advanced functions.
Installation and connection of GPS GLONASS navigator to the radio
GPS navigator for watching videos
Of course, you will have to be more careful when choosing a navigator. You must purchase a model with the ability to view video files and equipped with a USB or mini USB port. But most modern models have these functions, so the choice will depend on your preferences and capabilities.
You should also pay attention to the size and resolution of the display. The quality of the image being viewed will directly depend on these parameters. To watch videos, it is better to choose devices with a screen diagonal of at least 4 inches.
Connecting an external GPS navigator to the radio - this is a reasonable cost saving. Few people use a navigator all the time, but having one in the car makes life much easier. Therefore, you should not abandon this addition, especially if other uses have been found for it. And you are freed from the need to purchase a separate display.
We connect to the radio - we get high-quality sound
But the weak point of all navigators is the low-quality built-in speaker. Therefore, connecting a GPS navigator to a car's standard radio is necessary to create a highly functional, full-fledged multimedia system. You have the opportunity to use the navigator to choose a route or navigate an unfamiliar area, and your passengers will enjoy watching videos throughout the journey. The quality of sound and image will not cause any complaints.
For first-class operation, it is necessary to properly connect the GPS navigator to the radio. This will save you from various sound interference from the receiving antenna. Convenient switching is carried out from the remote control remote control.
In order not to make a mistake with your choice and to carry out qualified installation, contact the Carformer technical center. Our specialists will select a navigator model with a TFT display, taking into account your wishes. They will also connect GPS navigation to the car's standard radio. We recommend mounting it next to the rearview mirror or on the dashboard. It is in this place that it will be in front of the driver’s eyes and convenient for passengers to watch videos. Screen sizes of 4.3 or 5 inches are the most common, as they allow for comfortable viewing of videos, have good detail and at the same time do not block the view.
Also, if you plan to connect a GPS navigator to the radio in order to watch videos, we recommend considering models with a processor frequency of 600 MHz or more.
In our center, we will also install the accompanying software and select all the necessary adapters and adapters to ensure a high-quality connection of the GPS navigator to the radio.
carformer.ru
Is it possible to connect a navigator to a car radio?
Modern cars are equipped with all the necessary equipment, including a navigator, camera and others. technical innovations. A wireless camera showing the rear view can be connected to a navigator with using usb, thereby facilitating the procedure for parking a car. This device is very easy to install because there is no need for wiring. All necessary information is transmitted over a wireless network.
Do you need a navigator in your car?
Especially travelers, couriers, and ordinary motorists who often have to travel to different addresses cannot do without a navigator on the road. This electronic device broadcasts a map with markings and laying out a convenient route. Besides this device is able to determine where it is in this moment automobile.
The GPS navigation system was developed and launched by the Americans at the end of the last century. Russia also opened its satellite system – GLONASS.
The navigator looks like a small TV with a color display broadcasting a dynamic map of the area. It displays the necessary road and infrastructure signs. There are miniature models with a small display. The largest display can be 7.5 inches. The screens have low resolution, but graphics are displayed well on them.
Do you need Internet for a navigator?
A navigation device works better if it has wireless communication wifi, bluetooth. This makes it possible to connect additional devices type of headset, mobile phones, rear view cameras. Wi-Fi is required for independent Internet use and downloading maps.
The camera is installed using a wireless transmitter connected with two cables. The black wire runs along the body of the car, and the red wire goes to the rear light. Bluetooth can be used to connect the camera to a navigation device.
If you connect the navigator to a video camera, you can save money because you will not need to purchase an additional monitor; there is no need to clutter up the space; it will be easy and simple to operate.
The camera is connected to the navigator using a 12V cable, tulip.
Is it possible to use an iPad or netbook as a navigator?
The rear view camera can be connected to the following equipment:
- Navigator with monitor. In order for the video signal to be transmitted, you must have an RCA adapter, a wireless module;
- Tablet, iPad;
- Monitor with a torpedo. Installation of this equipment can be done in any place convenient for viewing;
- Netbook;
- Rear view mirror, monitor;
- Standard radio.
An electronic device such as a netbook with an appropriate program can be used as a navigation device.
Rear view camera capabilities

The rear view camera is universal. It can be used on any car. You should choose it based on size and resolution. You can get a high-quality picture with high resolution.
It is convenient to view video information on a mirror with a monitor. This method is the most optimal and convenient. Thus, the mirror image and the picture shown by the parking camera will be combined. According to experts, the camera should be installed with right side, since when the car is parked near the right curb, it will be possible to view a better view.
First you need to get rid of the upholstery on the luggage compartment, the right rear pillar and remove the luggage compartment door. Then the video camera can be placed in the camera lamp. After this, the wiring with the tulip is laid.
With a rear view camera, a warning is displayed when invisible obstacles appear on the road from the rear. Install this electronic system, it is possible in a special regular place provided by the manufacturer.
Often a video camera is connected to a car radio. When the reverse gear is engaged on the gearbox, the camera will start to operate. After all, a video camera of any model may not function for long. If the device works constantly, it will break.
When connecting the camera to the radio, you should be extremely careful, because incorrect connection short circuit and damage to the device may occur.
When connecting the device to the tablet, installation is performed special program RFK WIFI. When reverse gear is engaged, the application is launched and the camera displays an image located behind the car.
Video: is it possible to connect a navigator to a car radio?
realguy.ru
how to connect the navigator to the standard radio? [Archive] - Passat WORLD - Volkswagen Passat-CLUB
View full version: how to connect the navigator to the standard radio?
Good day to all! I decided to install a navigator with the ability to play MP3, do you want to connect it to the standard radio? who knows, did it, please tell me.
I want to integrate it so I can listen to MP3s too
Can you give more details? If the navigator has the ability to play MP3, then why should it also be connected to the standard radio?
ZY Maybe I’m promoting my music, but! functional head unit significantly expanded now. And all the chips fit. And also an obstacle to the hijackers was formed naturally: oops:
What kind of navigator is that? By chance, not Glospace SGK-70, otherwise I opened a thread here, just about this thing, and so in the description of this navigator it says: The navigator’s own speaker is not very strong, but you can always connect headphones to it or use an FM transmitter, to broadcast sound to your car radio and listen to music through your own car speakers.
You turn it on and search for a radio station: mrgreen:
30.12.2007, 01:28
The navigator's own speaker is not very strong, but you can always connect headphones to it or use an FM transmitter to broadcast sound to your car radio and listen to music through your own car speakers. The speaker on navigation systems is usually purely symbolic for voice notification and, to put it mildly, is not suitable for playing music. I have a headphone output on JJ-Connect, as well as the headphones themselves, and it is possible to connect an FM transmitter via a cord, but the question is why is it needed? Transmitters, as a rule, work very well with flashes, and the sound, to put it mildly, is again very far from perfect. Another nuance, the presence of music on the SD card implies it constant update, which sooner or later will lead to failure and errors in reading the SD, I think that you don’t really want to have a hassle with restoring the software and the Chezer service key. Navi is Navi, you should still use radio tape recorders for music.
It is of course IMHO. Here.
ZY The Mitseri company produces radio tape recorders of a strictly “A la original” design. Maybe it's worth taking a closer look at them?
30.12.2007, 14:43
A friend at work got so perverted. I installed a blue-toothed speakerphone, some kind of parrot, and output the sound to the standard speakers. It connects to the PDA as an external headset, all sounds go through the HS. But there is a problem - the radio does not mute. That is, both sources operate simultaneously.
30.12.2007, 15:30
Spaze Pash, please, if it’s not too much trouble, post a link to Mystery’s heads, what you were talking about above.
Ah, I understand everything. There is no AUX as such in standard recorders. Usually. That's why we need to collective farm. Either a changer emulator or a cassette player emulator. With separate audio input.
ZY The Mitseri company produces radio tape recorders of a strictly “A la original” design. Maybe it's worth taking a closer look at them? esli AUX net, then oboidemsy bez MP3. Thank you all!
Pirogoff, there seem to be two-din ones: http://mysteryaudio.ru/components/com_virtuemart/shop_image/product/96026e524ee15b668e58197135116aa6.jpg http://mysteryaudio.ru/component/page,s ... /Itemid,7/ (http: //mysteryaudio.ru/component/page,shop.product_details/flypage,flypage/product_id,66/category_id,/manufacturer_id,1/full_image,1/option,com_virtuemart/Itemid,7/) http://mysteryaudio.ru/ component/page,s ... /Itemid,7/ (http://mysteryaudio.ru/component/page,shop.product_details/flypage,shop.flypage/product_id,263/category_id,34/manufacturer_id,0/option, com_virtuemart/Itemid,7/)
http://mysteryaudio.ru/components/com_virtuemart/shop_image/product/a88413315b9a322bc22f6750c47c2a72.jpg
Look, maybe this adapter will work - http://www.passatworld.ru/phpBB2/viewtopic.php?t=45419
Powered by vBulletin® Copyright © 2017 vBulletin Solutions, Inc. All rights reserved. Translation: zCarot
PassatWorld.ru
Input for connecting a navigation system
- Please note the list of useful topics in the first message.
- Terms and the most popular models in messages are highlighted with quick tips and links to relevant articles in MagWikipedia and the Catalog.
- You do not need to register to explore the Forum - almost all relevant content, including files, pictures and videos, is open to guests.
18.04.2013 19:40 #1
Hello. Help me to understand. When selecting radios on the Yandex market, many models (for example Sony XAV-741, Kenwood DDX3053, Pioneer AVH-1400DVD) do not have built-in GPS, but have an “Input for connecting a navigation system”. It is explained as follows: “There is an input for connecting a navigation system. The navigation system is connected to this input, and the monitor built into the radio displays data coming from the navigation device. This is quite convenient, since the radio display is usually larger than the navigation system screen. "
Useful topics:
18.04.2013 19:40 # 0+
Best wishes, Administration of the Car Audio Forum Radio
18.04.2013 21:27 #2
Posted by techno007
The actual question is, what kind of navigation systems do you mean? Thanks in advance for your answer
All brands (not Chinese) that have this input for GPS navigation control their own navigation device - SONY - only SONY, the other will not support this trouble: SONY will not be able to work with PIONEER, as well as vice versa (station wagons are not made in the prestige of the brand and brand) - something like this.,
18.04.2013 22:32 #3
Gena60, I see, thanks for the clarification. Those. 2 din non-Chinese with navigation and normal operation with flash drives (apparently the Pioneer SPH-DA100 has problems with this) can’t be cheaper than 18t.r (Pioneer AVIC-F940BT)? And is there an option to order from abroad?
18.04.2013 23:22 #4
Mircom 500, phantom navigation box, bion... there are several more options. The wp9900 from wondeproud.com is especially interesting. The only trouble is that these options will not be cheaper than the mentioned option.
19.04.2013 12:15 #5
Message from restrict techno007, Mirkom 500, phantom navigation box, bion.. there are several more options. Particularly interesting is the wp9900 from wondeproud.com
The only trouble is that these options will not be cheaper than the mentioned option.
Thanks for the info. In general, are there more budget models with normal GPS operation?
19.04.2013 14:16 #6
Posted by techno007
In general, are there more budget models with normal GPS operation?
Radio? It seems that everything even works fine in Mystery... There is often a problem with the sound quality. PS: And some actually pee like boiling water from Chinese substitutes for ShGU, better known in our country under the brands phantom, concorde, etc.
19.04.2013 14:28 #7
Posted by restrict
Radio?
No, I meant the external navigation blocks that you recommended in the previous message
19.04.2013 14:41 #8
Posted by techno007
external navigation blocks
They all work quite normally. Glitches happen, but the number is at the level of a regular car navigator. The cheapest option is to order from China using the above link.
19.04.2013 19:55 #9
Posted by restrict
gena60, You would understand what you are advising.
Did you read post No. 1 carefully? The author of the topic did not give advice on the issue, but explained the presence of inputs for GPS in branded GUs and control of GPS from the screen only with your brand unit. If you mean viewing navigation images on the screen, any DVD can do this using the video input device, even a TV (if it is not black and white of the last century) - navigation control will only be from the functional buttons (remote control) of the purchased navigation separately from the brand of another company. This question did not dominate the choice of a GU with built-in navigation, of which there are many in one GU bottle, but sound or functionality, the user chooses, having defined the task for his requirements in different classes of the GI - if the presentation is not correct, criticism is welcome in any volume on the questions and answers specified in the topic, without restrictions, with justification for controversial positions.,
19.04.2013 21:00 #10
Posted by gena60
Did you read post #1 carefully?
Yes. Posted by gena60
navigation will be controlled only from the functional buttons (remote control) of the purchased navigation separately from the brand of another company
Here is a controversial position. I gave the names of the consoles - look in the search engines.
Since such a binge has begun, I’ll say that I can’t decide on the choice of cartoon - Pioneer X8500 or JVC KW-NSX700 - both have HDMI INPUTS for connecting smartphones on a bucket, which will completely replace my external Navi module. This is also an option, if necessary
PS: And, for example, Sonya and JVC do not produce Navi blocks for Russia at all, as far as I know. However, third-party navigation works with them. There are cables for connecting the SP-100 phantom even for Panasonic, which I’ve never seen inputs for navigation in my life (however, it’s worth admitting that I’ve seen only one multimedia Panasonic)
A radio with a navigator is a solution for a driver who has poor local orientation and wants to travel in comfort and music, using such a device. Let's figure out together what this miracle device is, how to choose and connect it!
[Hide]
Description of the radio + GPS
This article will focus on the combination of a radio that is installed in a car along with a GPS. This is a single device that performs both functions at once. Read more about what exactly these functions are and how to reflash and install the device below.
Pros and cons of devices
Regarding the pros and cons, we can say the following:
In most cases, the advantages are:
- High-quality and bright sound without interference.
- Good display, responsive to touch.
- Lots of different audio settings.
- There is integration with mobile gadgets.
- Good sound when talking through the standard microphone.

Some car enthusiasts consider the following indicators to be disadvantages:
- The price is too high.
- The screen backlight is too bright, even at zero.
- Searching for radio stations is not always successful.
Of course, these disadvantages are individual for different models.
Criterias of choice
There are two standard sizes of car radios, two standards, differing from each other in size, width and height. Therefore, when choosing a suitable car radio for your car - a device that will last you at least a year - you need to pay attention to the size of the device.
Types of radio tape recorders come down to these two:
- Din 1;
- Din 2.
The second option differs from the first in increased height, and is found in cars manufactured by Germany, Japan and the USA.

When choosing a car radio, you should be guided by the following rules:
- Do not forget that the sound also depends on the music system that is already installed: speakers, subwoofer. Sound insulation also affects the final sound of music.
- A car radio with GPS is a purchase that should be dictated by necessity. You should not save on this purchase, because if you buy a radio at a minimal cost, it will work for several days and then break.
- The same applies to new manufacturers. It is better to turn to time-tested companies. They may cost much more, but they are a quality product.
- It should also be noted that in model range There are several different models, differing in appearance and a set of functions. When choosing, you should focus only on the sound, because very often the models sound the same.
- – a convenient device Din 2, which has recently become very popular. With built-in navigation, they cost a little more, but the model can be selected according to personal preferences. Touch screen These radios are sensitive and slide out smoothly without delays or suspicious noise.

Review of popular models
You can find out about the most popular models below.
Mystery MDD-6270NV
This is one of the most popular models, its characteristics are as follows:
- display diagonal 6.2 inches;
- there is a digital tuner;
- built-in player and DVD player;
- there is an equalizer;
- audio amplifier;
- GPS navigator.
Prology MDN-2670T
This model is not much different from the car radio described above. There is also a navigator, a digital tuner, MP3 and DVD players. A good equalizer and sound amplifier (video author - Yaroslav450).
Clarion NX502E
This is perhaps the most popular of the models; it has several interesting characteristics:
- there is a built-in GPS module and Parrot Bluetooth;
- built-in microphone;
- extensive language settings;
- 6-channel audio output with amplification;
- there is an input for a rear view camera;
- The internal memory has the ability to store up to 18 radio stations.
How to flash an audio system with navigation?
It may have its own characteristics, but the approximate scheme of actions is as follows:
- First, clear (format) the memory card.
- Copy onto it pre-prepared software downloaded from a trusted site. This is done using an adapter and a computer or tablet.
- Insert card into .
- Wait for loading.
- After that, press the special SYS mode on the remote control. Then press and hold the SUB-T button for a few seconds. Click on STOP. After this, a desktop with settings will appear.
In budget cars, a standard rear view camera is rarely provided for basic configurations. Most often, automakers offer it as an expensive additional option. Many Russian car enthusiasts buy a separate rear view camera and install it themselves. To do this, you do not need to radically upgrade the car's electrical wiring. Connecting a rear view camera with your own hands requires basic electrical installation skills and experience in disassembling several interior and body elements. Installing a camera will improve the conditions for safe parking, monitoring the road in difficult traffic conditions
Selecting a rear view camera
Miniature rear view cameras should not be confused with optical sensors.
Installing the camera becomes the first installation step, regardless of the choice of projection device. When choosing a camera, there are several important points to consider:
- Viewing angle. A viewing angle of 110 – 120 degrees is considered normal. Drivers who choose cameras with a wide viewing angle (up to 180 degrees) can better assess the road situation, but must take into account the panoramic effect, which distorts the actual size of the image.
- Resolution and sensitivity. The standard resolution of 628 x 582 pixels suits most ordinary drivers; increasing the image quality for the rear packing video camera does not make sense. When choosing a color sensor (CCD or CMOS), you need to take into account that CCD transmits a higher quality image, balances colors, but is much more expensive. CMOS sensors perform worse in low light, but provide acceptable color quality in daylight.
- Availability of infrared illumination. Additional illumination with sufficient light provides best quality color image. In low light, the infrared source allows you to see the road behind in black and white at a distance of up to five meters.
- Video format. When choosing from the three formats that a camera can be equipped with (SECAM, NTSC, PAL), you need to consider what type of monitor the video image will be displayed on. The discrepancy between formats will make purchasing and installing a camera pointless.
- Signal transmission method. The division of cameras into wired and wireless affects the cost and connectivity. Wired video cameras are universal, they can be connected to all types of monitors. Cameras equipped with transmitting and receiving modules can often transmit images only to the navigator.
- Complete with cables. It is preferable that the camera be equipped with a three-wire video cable with an additional excitation wire; the power wire can be two-wire. The length of the cables also matters. The standard length (2-3 meters for a video cable, a meter for a power cable) may not be enough to connect the camera to your car model.
- Case material. Experienced car enthusiasts choose cameras in a metal case, considering it more durable and durable than a plastic one.
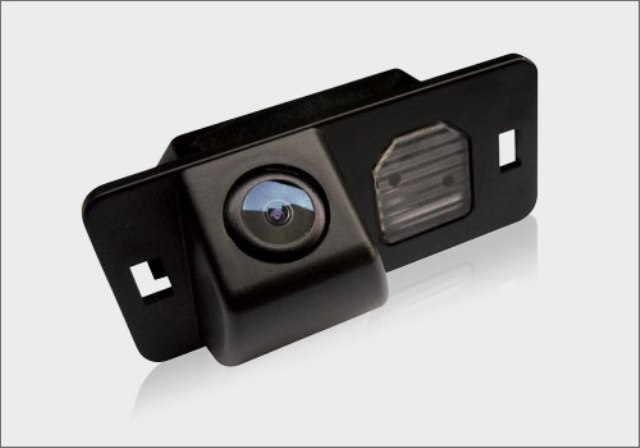
- Variability of installation location. There are cameras mounted in the license plate frame, and devices in a separate housing. A separate video camera requires a choice of several installation locations that are convenient for the driver.
The remaining standards of video cameras (presence of parking lines, power voltage, protection from dirt) are the same for most models.
Many car enthusiasts find rear view cameras equipped with a monitor mounted in the rear view mirror the most convenient.

It is difficult to deny the convenience of such a device. The monitor turns on when the reverse movement begins, allowing you to see the road situation in good resolution. The main disadvantage of such gadgets is the high price, which is unaffordable for many categories of car enthusiasts.
Less convenient is the rear view camera, equipped with a folding miniature display that can be placed on the dashboard

The main disadvantage of such devices is that the view is cluttered, especially if the car already has a DVR, navigator, or a separate radar detector installed. Car enthusiasts find it more practical to use the display of one of the existing devices. Having purchased a rear view camera of any type (with or without a monitor), you need to install it in the rear of the car.
Practical operations for installing a video camera
We do not consider installing a camera behind the rear window of a car. With this installation, the camera glares and does not allow you to see nearby obstacles from behind. There is no need to be afraid of vandalism; a camera with torn wires is of no interest to buyers, but it is better to disguise it in the rear bumper or under the trunk lid.
If the camera is mounted in the license plate frame, you have no other installation options. When choosing a location, most experienced mechanics find it more convenient to install the camera above the license plate, at an angle to the road surface.

In any case, to install the camera you will need:
- install the video camera in the intended location;
- connect the camera power;
- bring the video cable to the front of the car;
- connect the video cable to the monitor to transmit the image.
The steps to install a video camera depend on your car model (sedan, hatchback, crossover) and installation location. To do this, you can use existing holes in the bumper, fifth door lid, or cut new installation locations. It may be necessary to dismantle the bumper and install additional brackets for attaching a video camera (metal plates) on the inside of the body part.
Most in a convenient way To power the video camera, most experts consider connecting the power wire to the left rear light. This may require disassembling the trunk sill and the left side of the trim. Having disconnected the rear light block, you need to use a multimeter (with the rear light on) to find the power supply contact.
For most video camera models, the three output wires are color coded. Red is used for the positive power wire, black is used for the negative wire. The yellow marking indicates the video cable. The red wire is connected to the contact of the flashlight, the black wire is connected to the car body. It would not be superfluous to provide the positive wire with an additional fuse (0.5 - 1A) in the circuit.
The most in a simple way The video cable will be installed on the left side of the cabin under the removed sill covers and floor trim. To secure the cable, you can use special tape or plastic clips. All installation operations end with the installation of the removed body and interior elements in their original places. It is necessary to finally secure the screws and clips of the casing only after testing the operation of the camera and making sure that it is working properly.
For novice car enthusiasts, the greatest difficulty is connecting a video cable to an accessible monitor. Most owners of budget versions of cars consider connecting a camera to the car radio display to be the most convenient way.
Connecting the camera to the radio (car radio display)
The video camera can only be connected to radio tape recorders with a liquid crystal display measuring at least 3 to 4 inches. Monitors smaller sizes will not provide the desired image quality. The free connector of the video cable is connected to a special output of the head unit (to find it, refer to the instructions for the radio). If such an output is not provided, it is possible to connect to the output marked VIDEO IN. If the sockets and plugs do not match, you will need to purchase an adapter.
You can see in detail how to connect a rear view camera to the radio in the video:
After connecting the camera to the liquid crystal display of a high-quality car radio, a “picture” of decent quality is displayed.

The image clearly shows the “mirror” effect when the video camera is operating, which is easy to get used to after several days of using the parking sensors.
To get used to the scale, you can go out and look at the real distance between the cars, and estimate the gap remaining to the obstacle.

Connecting a video camera to a navigator and navigation devices
Connecting a rear camera without its own monitor to the navigator is logical. Without cluttering the dashboard or center console with an extra screen, you use the already familiar installed device. Questions about how to connect a rear view camera to a navigator do not arise when purchasing a device for which such an option is planned.

The packaging of such navigators indicates the possibility of connecting a video camera, and the instructions specify the necessary user actions when connecting. The navigator kit may include adapters for connectors of popular video camera models.
If a rear view camera is already installed, the car enthusiast can only plug the plug from the video camera into the desired connector.

If you do not have a standard video camera connection, you will need to purchase additional cables, plugs, and a special adapter. Schematic diagram The power supply from the rear light and the electrical wiring to the projector remain unchanged.

An adapter from RCA to the input to the navigator (often called a “tulip” in everyday life) is needed only if there is no AVI input. For navigators equipped with such an input, a standard video cable connector is often suitable.
Connecting a rear view camera to a tablet and mobile electronic gadgets
Of all types of electronic wearable devices (laptops, smartphones), a tablet is most convenient for connecting a rear video camera. The monitor screen size and resolution quality are suitable for work. The flat body of the tablet allows you to choose several options for convenient installation.
Often, owners of cars with a primitive radio, without a navigator, have no choice but to connect a rear view camera to a tablet. To connect a wired video camera, you will need to purchase a TV tuner (looks like a flash drive) with a video input plug.

On the Internet you can easily find designs for homemade tripods for tablets that make it easy to install and remove mobile device on the dashboard or center console. For small tablets, you can install a special slot on the back of the sun visor.
For tablets with operating system“Android” requires that the video camera model be adapted to the “OS”; the tablet must be equipped with a USB port. In some cases, you will need to install additional software.
Conclusion
A properly installed and connected rear view camera will provide more quality review Compared to the view from the side mirrors and the interior mirror, it will remove “dead” spots, show stumps, parking posts, and holes in the asphalt.

Installing a parking or rear view camera improves the safety of parking and reversing without requiring much effort. If you do not have the skills to work with a car yourself, connect electronic devices, to install the camera you need to contact experienced specialists.