Inserting PHP code into HTML. How to do it right? How to insert html code: all possible options Inserting html code into a page
The method for inserting html code is slightly different depending on where exactly you need to paste it. Accordingly, we will consider different options.
To insert html-code on the site, and in particular in the text of an article on one of the pages of the site, go to the administrative panel, select and open the desired article for editing. Next, the visual editor mode must be changed to the editing mode. When working with a CMS system, to change the mode, simply press . Then copy and paste the html code into the planned place.
Often, after pasting, you want to format the code a little, for example, set the text to wrap around the code on the other side. There is an easy way to do this using CSS properties.
Using the tag
So that when saving an article, the visual editor does not cut out changes that, in its opinion, are not html code, it is better to disable it when inserting the code. The editor's cutting of changes is designed to prevent the threat of possible malicious codes.
How to disable the visual editor?
In the admin panel, click "Site" - " General settings» - «Site» and in the line «Visual editor» select «No Editor». Now it will be possible to edit and insert html code in html code mode. Once you've pasted the code and saved your changes, the visual editor can be re-enabled.
If you want to re-edit the article, the html code will also need to be re-inserted. Sometimes it is required that the html-code is displayed on each of the pages of the site. Inserting html code so that it is displayed on each of the pages of the site.
To solve this problem, use notepad or another editor to enter the main site file (the default is index.php or index.html). IN open file choose your preferred place to paste the code. For convenience, you can specify a phrase in the search, located in the place where you need to paste the code, so you can find it faster. Then copy the code and paste it where you want. If necessary, the code can be formatted in the same way that was described for formatting the code in the article.

There are many tools that are ready to help you improve the site, increase efficiency online business and build relationships with clients. Many of these tools are free. But what if you're not a web developer and don't know how to install them on your site? This is a big hurdle.
No matter how ironic it may sound, but a business that develops useful tools for your site, there is also an obstacle to your own prosperity - the need to impose the installation of your code on users.
Let's try to solve two problems at once by talking about the most common ways to insert JavaScript code / snippets (fragments) for websites:
- On WordPress.
- Self-written admins (using old-school FTP).
- On Squarespace.
- On Shopify.
At the end of the article we will touch on Wix. In most cases, this platform does not allow you to install JavaScript codes or snippets, but it does offer an alternative in the form of integrations for various services.
Where can I get the installation code?
Let's see where to look for the installation code using the Crazy Egg service as an example.
The process is standard: we enter registration data, after loading we get into the dashboard. There we are looking for a section with a code.

How to insert code into a WordPress site
You can use a special plugin - Tracking Code Manager.
To insert the Tracking Code Manager, we enter the site admin panel and look for the plugins section in the control panel.

Select the "Add New" function.

A search bar will appear on the right. Enter "Tracking Code Manager", then click "Install Now".

After the installation is complete, you need to make sure that the plugin is activated. Let's go to the settings.
Click "Add new Tracking Code".
![]()

You can do without the Tracking Code Manager plugin. In this case, our option is to paste the code into the header.php file of your WordPress theme (more on that later).
How to Install Code on WordPress.com Website
Website on WordPress base and WordPress.com are two different things.
A WordPress site is a site that is managed by a CMS installed on its own server. It means that you paid for Domain name(myname.com) and for hosting.
WordPress.com is free. You can register a site on it without paying for hosting. In this case, the site URL will be: myname.wordpress.com. To change the domain name, you will have to perform a few additional steps.
When you manage your site on WordPress.com, you are limited in what JavaScript codes and snippets you can install. The reason is in the security protocol - the developers do not allow users to insert codes on the platform. For example, the developers of MySpace allowed. This is obviously why the site dropped from 5th place in the world in 1967 in six years.
However, WordPress.com offers users various bonuses for doing business. For example, integration with Google Analytics or the ability to add social media buttons. But in some cases this may not be enough.
How to install JavaScript codes and snippets on a self-written admin panel
With the help of FTP. We'll have to go back to the basics.
Now many sites are self-written. Self-written site created from scratch, does not use CMS for content management.
Imagine that we have such a site. Putting code on it will be a little more difficult than on WordPress, because you have to remember about FTP.
FTP managers like FileZilla allow you to drag and drop files and images from a website to a server. Using the program, you can add files to the server or download them, replace old files with new ones, delete unnecessary data, change dock names.
There is nothing complicated in the data transfer protocol: after 20 minutes you can feel like a pro. For most people, the hardest part is just contacting the server.
If you have any problems with the server, please contact the host. It may take an hour, but after 60 minutes you will know everything you need. I usually recommend recording such conversations with ScreenRecorder. Or at least make notes by hand.
Once you have logged into the FTP server, be sure to do the . If you make a mistake, important files will not go anywhere. You can make a backup using a simple drag and drop of all files from the server to your computer.
Typically, the FTP manager API consists of two columns. For example, in the image below, in the left column, you see the files that are stored on the computer. On the right - files from the server.

To change or add files, just drag and drop them from one column to another.
Warning
Replacing files is dangerous. Can be easily replaced new version old file and lose more up-to-date data, accidentally delete something important, or make another mistake. Backup copy allows you to insure against such mistakes and protect yourself from unnecessary problems. Be sure to save all files in a separate folder on your computer before making any changes.
How to insert code using header.php
Let's say we have a website that we use WordPress to manage. To paste the code, we need to find the header.php file or another file called header or head.
header needed to activate the code or JavaScript fragment on all pages of the site. To open a file, you can use free program like Sublime Text. With its help, you need to open a file that is stored on the computer, and not a similar file on the server.
Opening the file in Sublime Text, we will see a rainbow from the color code. Don't be afraid, everything is simple.
All pages are divided into two sections - The head (headers) and the body (body). Headings are denoted by HTML code
And. Body - And.
Most of the stuff that makes the site work and display text falls between these two sections. To find these tags, you can use the page search.
In most cases, you can paste the code right before the closing tag.

Once you've pasted the code or snippet, save the file and upload it to the server. Ready.
Now about self-written admin panels. If your site was created by hand and you can't find the head or header file, you will most likely have to manually insert the code into each page. Most of the time, this doesn't cause much trouble.

The image above is a hypothetical HTML site that consists of four HTML files. If we wanted to insert some code on it, we would have to open all these files in turn and paste the code or snippet into the tags of each of them. After that, the process is standard: we save the files and upload them to the server instead of the old ones.
How to embed a code on a Squarespace website
Squarespace has made it easy for its users. To insert code or a JavaScript snippet, you can use "code injection". In the menu, go to the tabs Settings > Advanced > Code Injection. You can add code to
or site footer.Finding settings.

Scroll down and click on "Advanced".

Select "Code Injection".

Paste the code and save the changes.

How to insert code on Shopify
In the control panel, find the section with online stores Online Store and select Themes.

To access the desired tab, click on "Actions" and select "Edit HTML/CSS".

We need fragments.

Clicking on the option will open a dialog box with the ability to add a new fragment.
Give the snippet a name and click the Create snippet button.

Enter the code for the snippet in the "tracking snippet.liquid" area. Click save.
How to paste the code if the site is on Wix
Wix has quickly become a popular website builder. Like WordPress.com, it imposes restrictions on its users in the ability to paste codes.
But Wix offers a solution in the form of the Wix App Market. There you can find a variety of widgets for marketing, social media and analytics. By the way, there you can also vote for the most needed widget.
Do you want to post a code on the site with some kind of solution or instruction, but you have problems with this? Learn how to get it right and display the code as it appears in the code editor.
It would seem that it is not a difficult task to insert the code, but difficulties may arise if you do not know about some of the rules that will be discussed.
Paste code as code
To insert the code on the site, it is wrapped in tags
AND . This results in the following construction:
Here is the code
To explain briefly and to the point, in this design, the code tag tells the browser what is inside it programming code, and the pre tag preserves line breaks, line tabs (indents), and spaces.
Everything seems to be clear and there is nothing complicated, but the problem is that if you want to insert html code or code containing characters< , >, & , " , ` , then problems may arise - the browser will process your code as html. For example, if you want to show the form code with a button, input fields, etc. in the code, the browser will display the form, not its code.
Code escaping
To prevent this from happening, they do the so-called code escaping - this is when the characters mentioned above are replaced by their UTF codes.
Scheme for replacing characters with utf codes
The symbols and codes that replace them are shown below:
Of course, no one does the manual replacement of characters - this is done programmatically. The most accessible tool for this is online code escaping, where in an instant all characters will be replaced, and the code will save all spaces and hyphens and will be completely ready to be inserted into the tag construction
As a result, after escaping, you can insert any piece of code. You can see an example of such an insert after escaping the code below:
header
Related Posts
Hello dear readers!
Let's talk about the program code on the site. Often, a webmaster needs to insert a code on one or more pages of a site. WordPress allows you to use php, java, html, css, etc. code in two ways: as executable commands, interpreted by the site engine, and in the form of readable and copyable text. In this article, we will look at examples of how to paste code into WordPress page so that it is displayed correctly and beautifully for visitors.
Code in the form of text: why is it needed
The need to output code in WordPress is not common. It is safe to say that the owners of medical, construction or culinary blogs are unlikely to have such a question. What can not be said about the authors of projects devoted to topics such as creating and, web design and programming, application development, etc.
The need for publication individual lines code is sometimes not limited to simply adding desired fragment to the website. The accompanying desire to “make it beautiful” rests on the use of code syntax highlighting and on certain implementation methods. Highlighting the code on the site can greatly facilitate the perception of data by visitors who are accustomed to using advanced editors like .
If you just paste the code into an article, WordPress will interpret it and distort it when it is published. Therefore, such a data type must always be processed. You can solve this problem in various ways: manually adding the necessary tags to the page, using the button built into the WordPress editor, and using various plugins.
How to add code to an article without a plugin
WordPress offers the site administrator its own tool, which is part of the content management system, to solve this problem.
A block consisting of one or several lines of code added in the visual content editor, WordPress replaces all characters in tags when switching to text mode< и >symbols <
And >
To show the CMS that a certain piece of code should be displayed on the page "as is", it in text editor WordPress needs to be highlighted and "wrapped" with a tag using the button on the toolbar:
It will look like this on the page:
Name 1
Name 2
Value 1
Value 2
To insert code into a WordPress page with specified indents, when switching from a visual content editor to a text editor, you can use html tag
Preserving any extra spaces used to form indents. Element content AND By default, it is displayed in monospaced fonts by browsers.
An example of how to insert html code into a page without plugins using a tag in WordPress
Name 1
Name 2
Value 1
Value 2
To tag
Universal attributes are applicable, in particular the attribute style The used to define the element with using CSS. The following example shows how attribute values style set the color of the displayed text, the background color of the block, the thickness, color and radius of the block border:
The possibilities for formatting blocks displayed on the page using attributes are quite wide, but not unlimited. The use of the considered tags is justified when single lines or small code fragments are added to the page as examples. ABOUT beautiful design in this case, there is no need to say, the result of the insertion will be extremely minimalistic, but for many this is enough.
Complex formatting that allows you to implement syntax highlighting is the result of the plugins, which will be discussed below.
Code Insertion Plugins for WordPress
We offer a choice of several plugins from the official WordPress repository that allow you to display any code (php, java, html, css) beautifully: line by line and with appropriate highlighting of elements.
SyntaxHighlighter Evolved

A common plugin for inserting code in WordPress, advanced and powerful, on the settings page of which you can apply one of the seven available design themes and, if necessary, choose to display line numbering and toolbars, make URLs clickable, collapse the code field, set automatic wrapping long lines etc. There is also a visual preview of the output, there is a decoding of the attributes used.
In the plugin SyntaxHighlighter Evolved Everything you could ever need is provided. It is very easy to insert code into a WordPress article using it, for this you need to allow the plugin to process the tag in the settings
Or use the appropriate shortcodes:example example example example
wp-syntax

Another plugin that has been deservedly recognized by webmasters for a long time. Currently, the statistics of the official repository show more than 10 thousand active installations. Unfortunately, the plugin has not been updated for a year, but it continues to perform its declared functions.
wp-syntax does not have its own settings page. This WordPress plugin for editing code, more precisely, for inserting it and changing the appearance of syntax highlighting, uses the tag
With language selection attribute:
example
example
example
The list of supported languages is given on the plugin page.
Attribute line in the tag is used to display line numbering, its value corresponds to the line number from which the countdown starts. If the code contains html objects, it is recommended to use the attribute escaped with meaning true as an option:
example
An example of CSS code output and highlighting using the plugin:
1
2
3
4
5
6
7
8
.block ( border : 2px #8E0505 ; color : #2D0000 ; /*text color*/ padding : 2px ; /*padding*/
text-align : left ; /*text alignment*/ font-family : arial; font-size : 14px ; )
Block ( border: 2px #8E0505; color: #2D0000; /*text color*/ padding: 2px; /*padding*/ text-align: left; /*text-align*/ font-family: arial; font-size : 14px; )
When switching from html editor to visual mode, the WordPress tag interprets the tag
And the code is not displayed correctly. Therefore, when editing articles with code block inserts, you must use the content editor in html mode.
Code Prettify

A lightweight, no-configuration plugin that allows you to insert code on a WordPress site using automatic highlighting without the need to specify the language. Implements highlighting for tags
AND On the page. A simple module-based solution Google Code Pretty library for those who do not want to delve into the peculiarities of formatting the syntax of blocks displayed on the site with program code.
Conclusion
The plugin-based solutions discussed in the article are only a small part of what the repository offers. WordPress plugins. By clicking on the console menu links "Plugins - Add New" to the search page keywords highlight And Syntax you can find several dozens of similar plugins that allow you to beautifully design the program code. It is important to understand how appropriate and necessary such a plugin will be on the site. Perhaps it is in your case that it will be easier to insert the code into a WordPress page manually in a text editor using tags
AND .
Before embed code on site you need to know the structure of the site. You should not paste the code anywhere either. For certain elements site, there are places reserved for them. For example, they try to place banners with advertisements at the top of the site, and traffic counters at the bottom.
What code do we want to insert?
- For example, we want to insert (connect) some javascript, as usual, scripts are either taken out into a separate file or placed at the top of the site.
- If you want to insert a banner with advertising, then it is preferable to choose the same upper part of the site (site header, navigation menu, place above the post), but in some cases, advertising banners are inserted inside the text or at the end.
- The code of social bookmarks (icons) is placed before the post (at the beginning of the page) and at the end.
- Attendance counters, if placed, are at the bottom of the screen.
These are just a few examples.
In each case, one or another part of the site is selected based on its specifics.
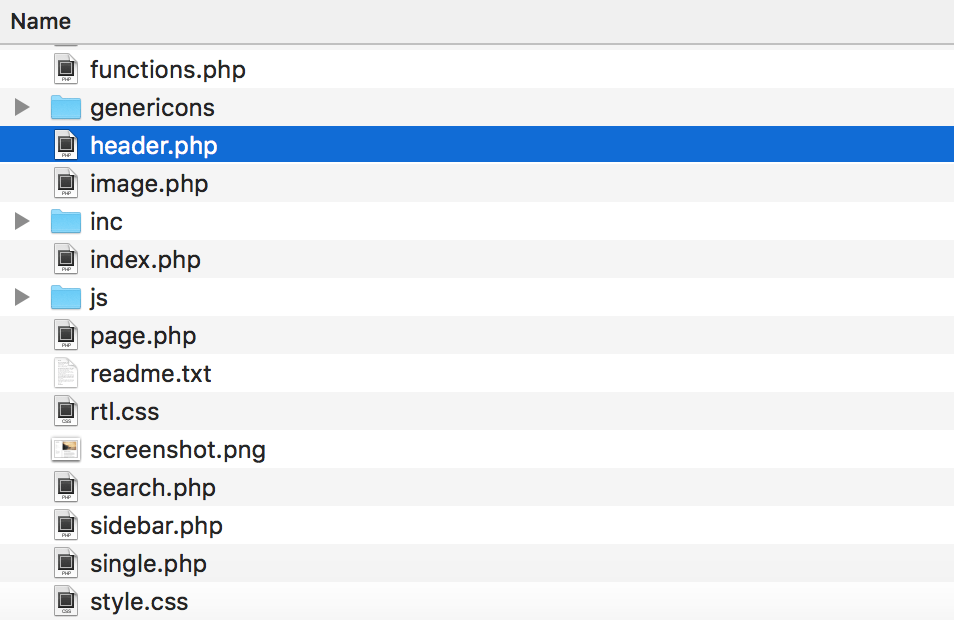
We are looking for (defining) a file to place the code
For the display of the site, as a rule, several files are responsible. Here are the most popular in WordPress: index.php; single.php; page.php header.php; footer.php; sidebar.php style.css
Top of the site
The file is usually responsible for the output of the upper part. header.php (site header). The beginning of this file usually looks like this:
>
You can paste the script here
Between tags
place scripts that work on all pages of the site.
The contents of these tags can be different for each topic.
Site's home page
Per display home page The site responds with the index.php file most often with php language this file combines code from other files, for example (header.php, footer.php), thereby the page displayed in the browser is assembled from several files.
Site Side Menu
The sidebar.php file is usually responsible for displaying the sitebar (side block) on the site. Here you can also insert a block with advertising.
Record output
In case you want to change the reflection of blog entries, use the single.php file.
Site pages
To change the pages of the site, use the page.php file.
Site Footer
Another file that is in almost every template is footer.php, you can also place scripts in it, it is often used to insert attendance counters.
Page appearance
If you want to modify the display of the site, then you need a style.css file.
Now you roughly know which files are responsible for the output of certain parts of the site.
Determine where to insert code
To understand where to insert the code, you can use the standard tool Google Chrome for this click right click click on a free part of the page and select the view code tab.
With it, we can determine the name of the block above, below or in which we need paste your code.
To select the desired block, click on the button highlighted in red and hover over the desired area of the site.
The picture above shows a panel in which you can see the code of the site or the selected block.
Need to turn to class name of that block above, below, in which you can insert the code.
Now paste the code you need and check the changes.